Maker settings
First off
We will start by completing the initial maker information set up.
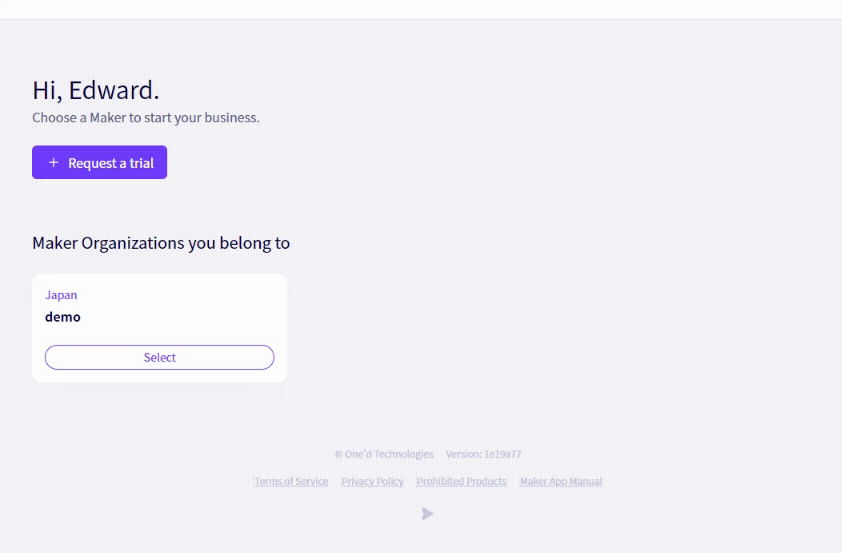
Click the purple ‘Select’ button.
Click the red ‘Go to Maker Settings page’
■ Accessing Maker settings from a Brand page
Click on ‘Maker Settings’ in the upper left > ‘Open Maker Settings’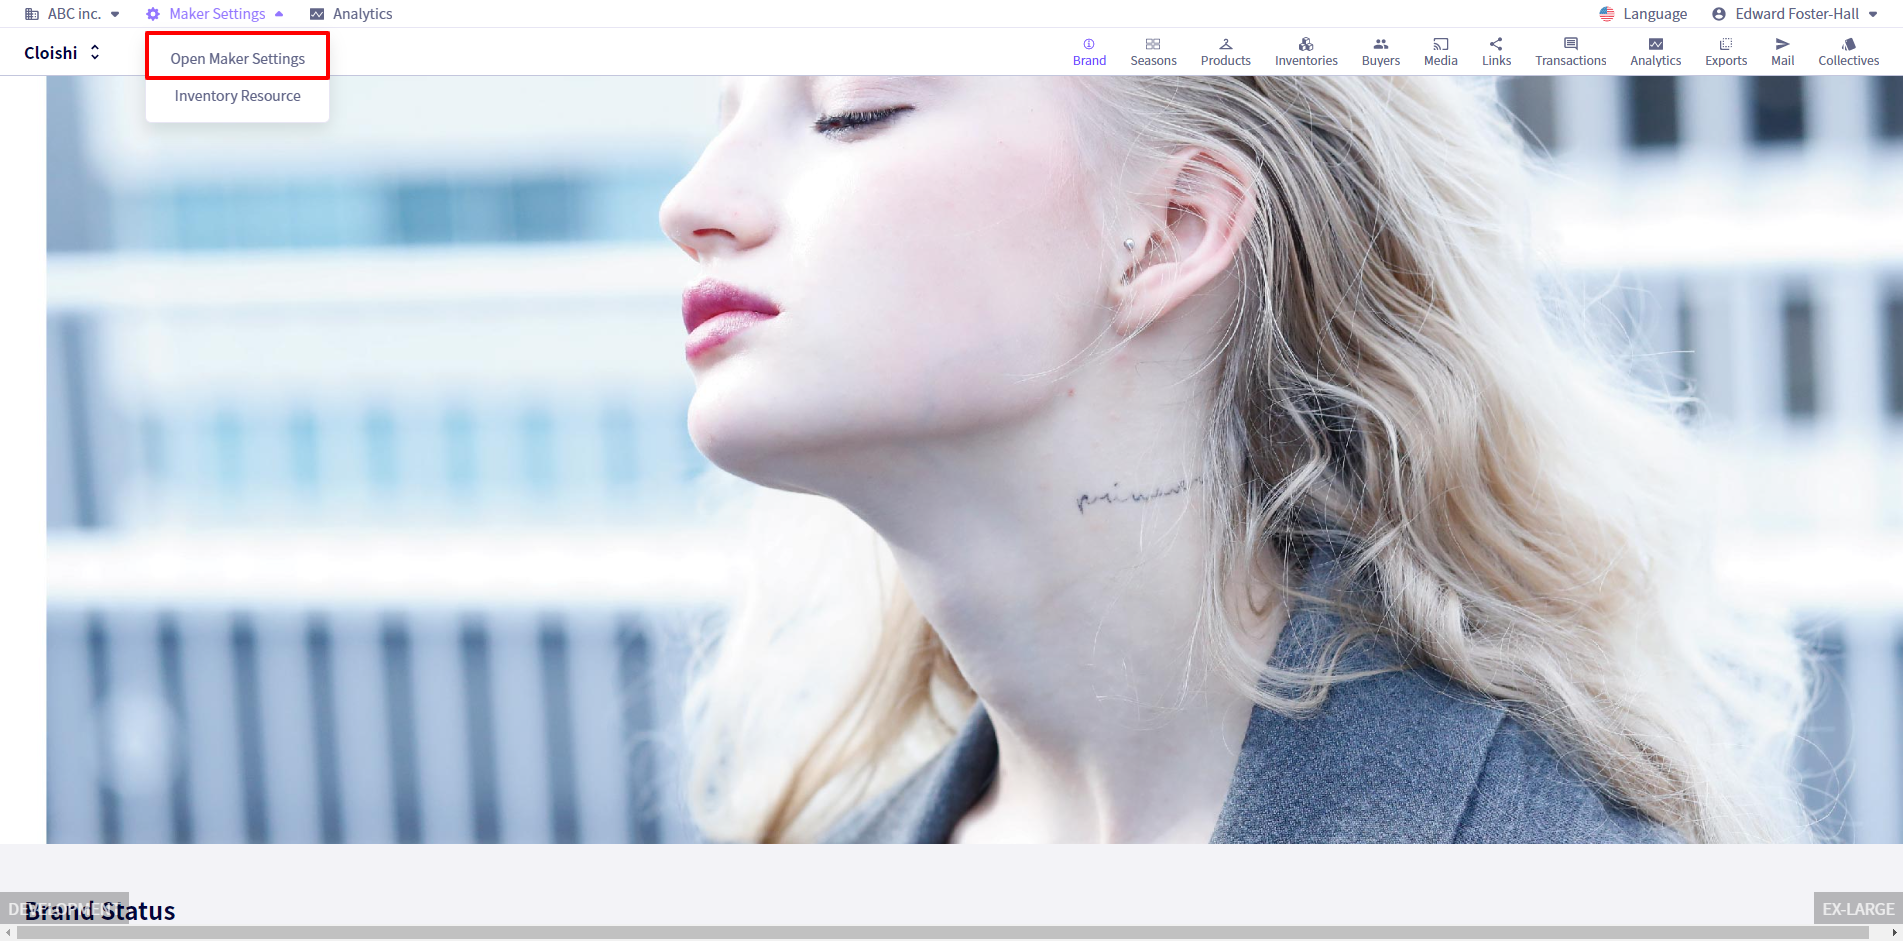
We will now set up the following 9 sub headings seen in the red box below.
※ ‘General’ ‘Office’ ‘Config’ ‘Tax List’ Are all sections that are required to be filled in.
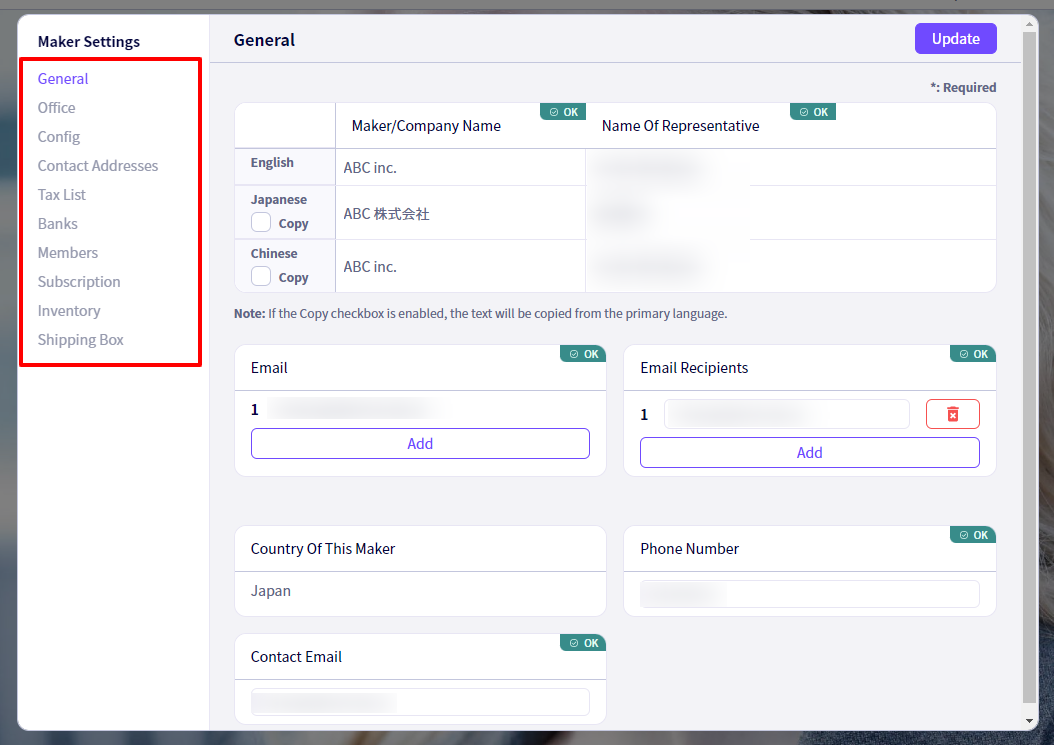
Step 1:General
Here you can fill in basic information about your company. (The company name, name of the Representative, Email addresses, Recipient email addresses, Country of the maker and phone number.
All fields under the general sub-heading are required fields.
① Click on ‘General‘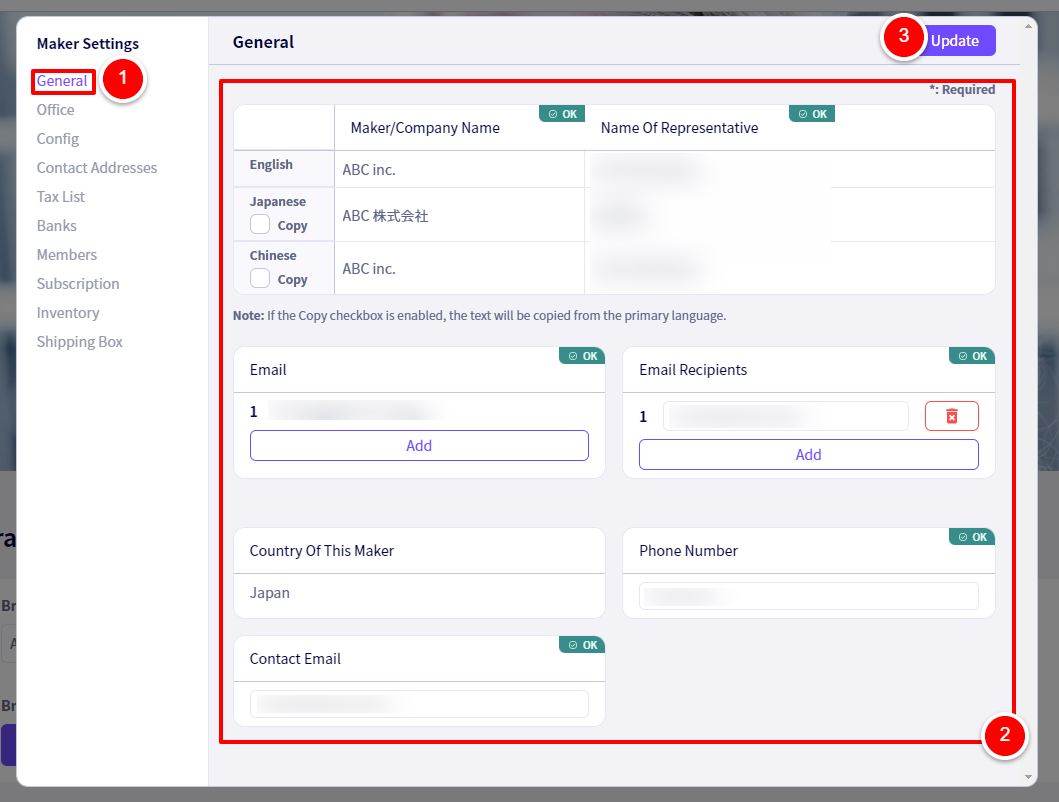
②Fill in your Maker/Company information in the red box as seen above.
You are able to add multiple Email and Email Recipient Addresses.
③Click on the purple ‘Update‘ button.
Step 2:Office
Here you can fill in basic information about your office and address.
The fields under the ‘Office’ sub-heading are all required fields.
① Click on ‘Office‘
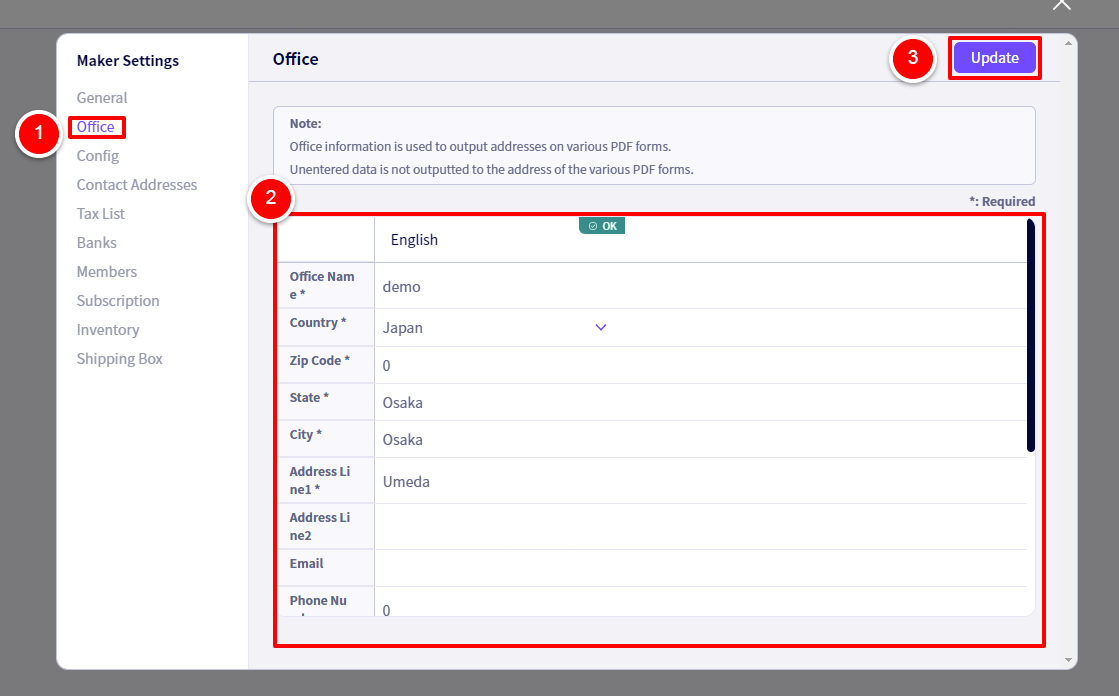
②Fill in your Office/Company information in the red box as seen above.
If you have only one address there is no need to fill in a second one.
③Click on the purple ‘Update‘ button.
Step 3:Config
Here you can set up your Language, Currency, Billing and Transaction Terms, as well as Transaction Management.
The fields under the ‘Office’ sub-heading are all required fields.
① Click on ‘Config‘
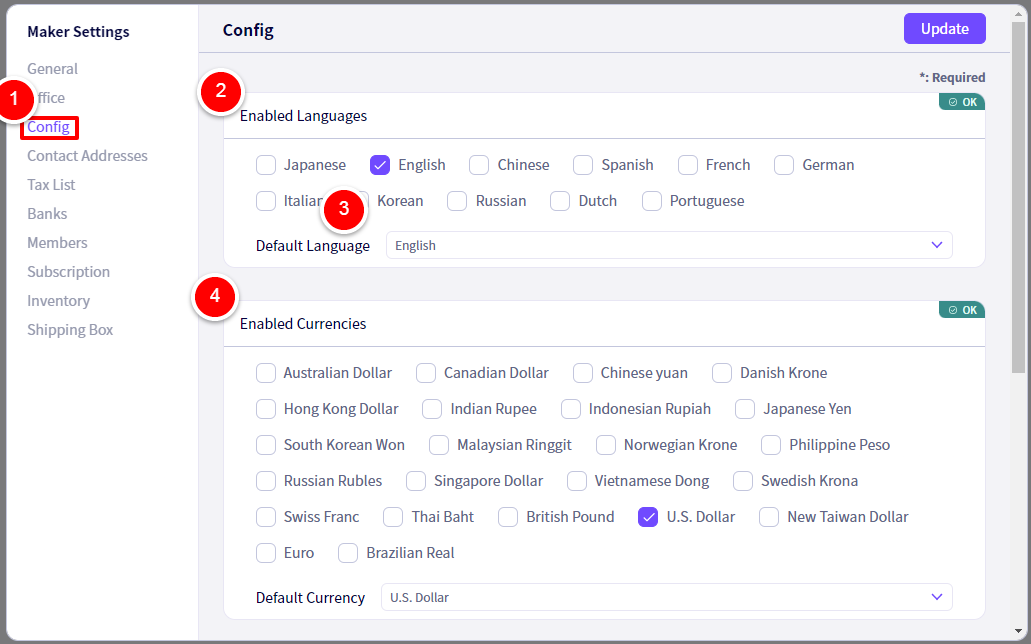
②【Enabled Languages】Here you can enable or disable languages to use in transactions. Enable all languages you will use during transactions.
③【Default Language】Here you can set your default language.
※If you selected multiple languages in ② including English, it is recommended you set the default language to English.
④【Enabled Currencies】Here you can enable/disable currencies to use in transactions. Enable all currencies you will use.
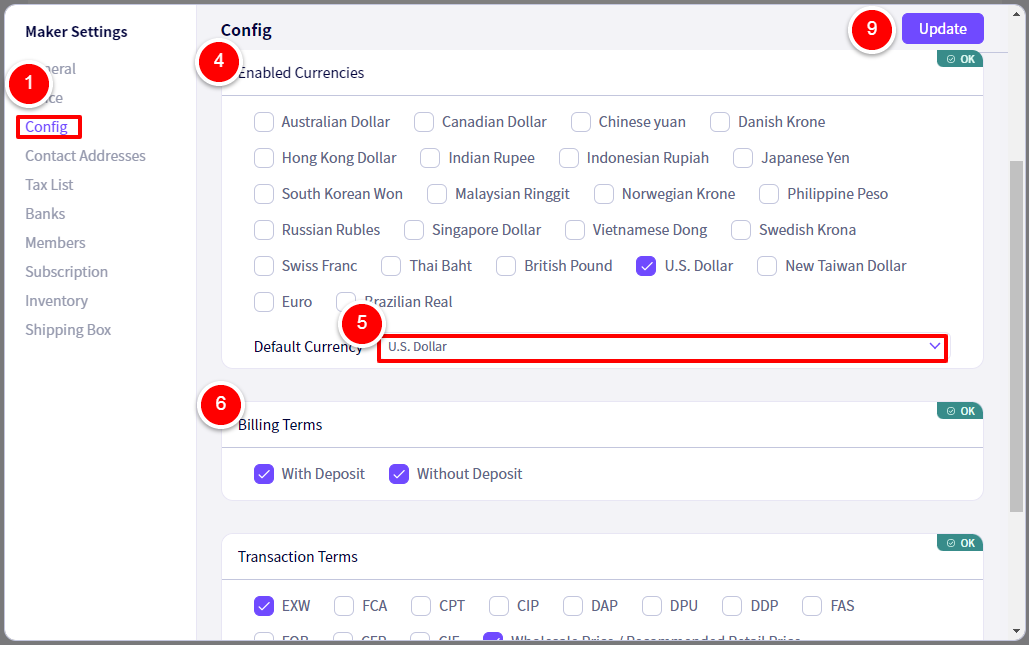
⑤【Default Currency】Enter your companies default/standard currency here.
⑥【Billing Terms】Here you can choose if you wish to set deposit settings for transactions or not.
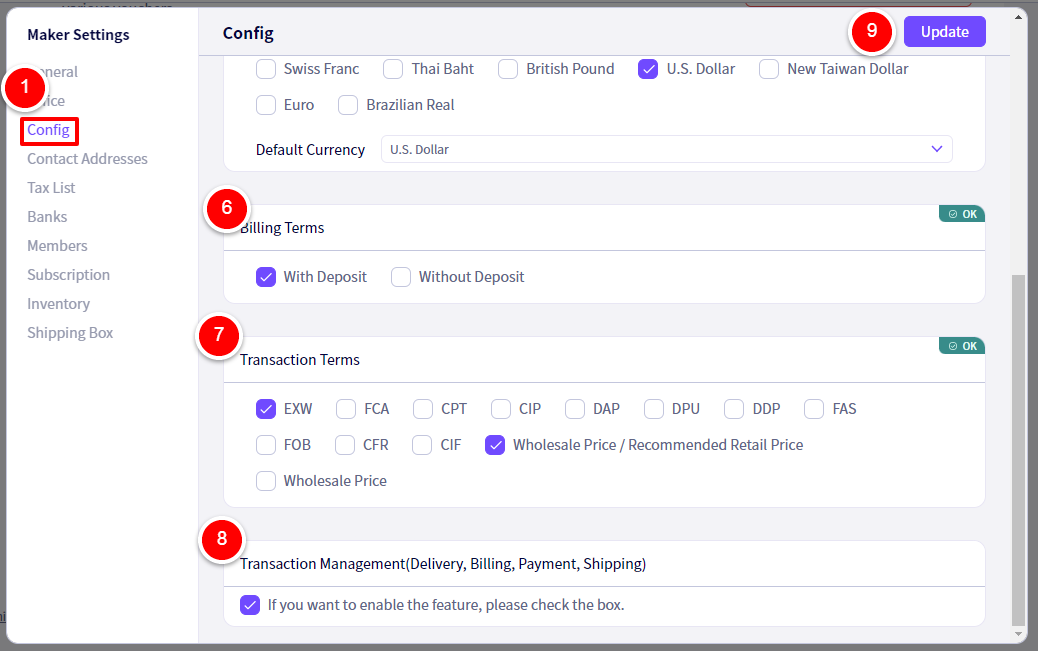
⑦【Transaction Terms】Please enable the transaction terms you wish you to use here.
⑧【Transaction Management(Delivery, Billing, Payment, Shipping)】If enabled, you will be able to create statements of delivery, among other things.
※This is disabled by default. if you do not need to create statements of delivery, etc, please feel free to leave it disabled.
Step 4:Tax List
Here you can set up tax terms.
All fields under the ‘Tax List‘ heading are required fields.
① Click on ‘Tax Lists‘
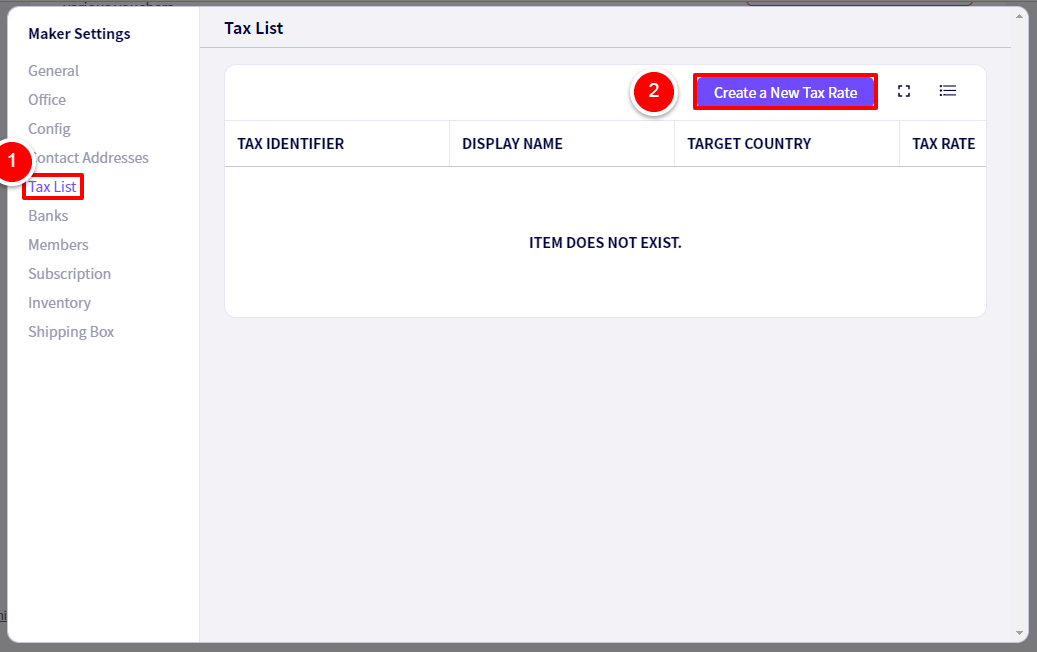
② Click on ‘Create a New Tax Rate‘
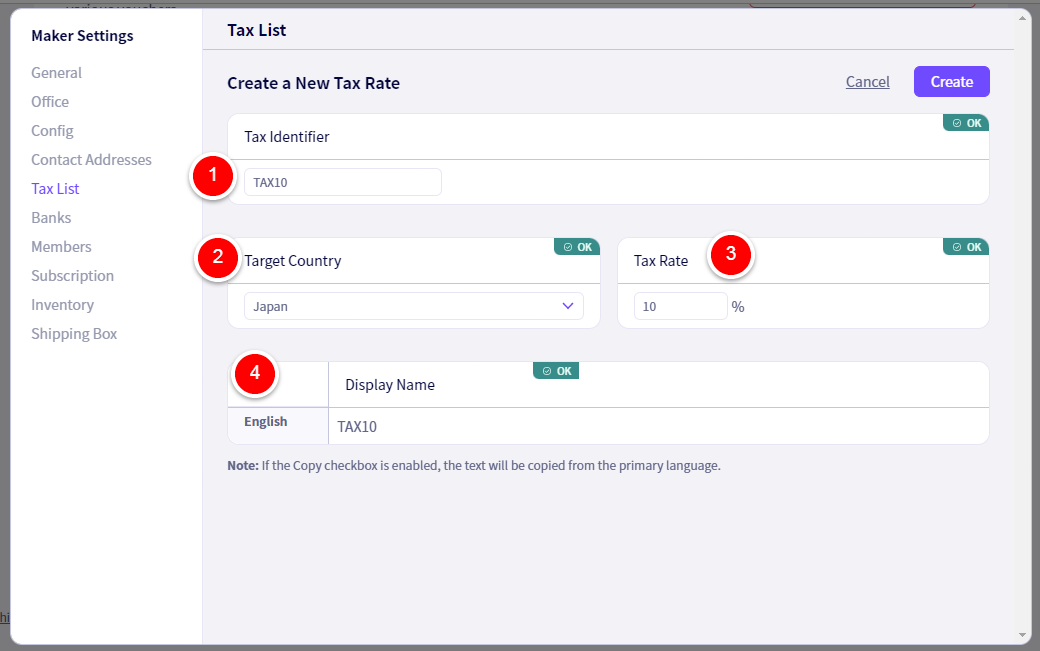
① TAX IDENTIFIER
E.g)TAX10
This identifier used when setting up other systems
② TARGET COUNTRY
※ Select the country where this tax rate may be applied
③ TAX RATE
※ Enter the tax rate here
④DISPLAY NAME
※ The name displayed in each language enabled for this tax rate.
Step 5:Banks
Here you can enter your bank details.
① Click on ‘Banks‘
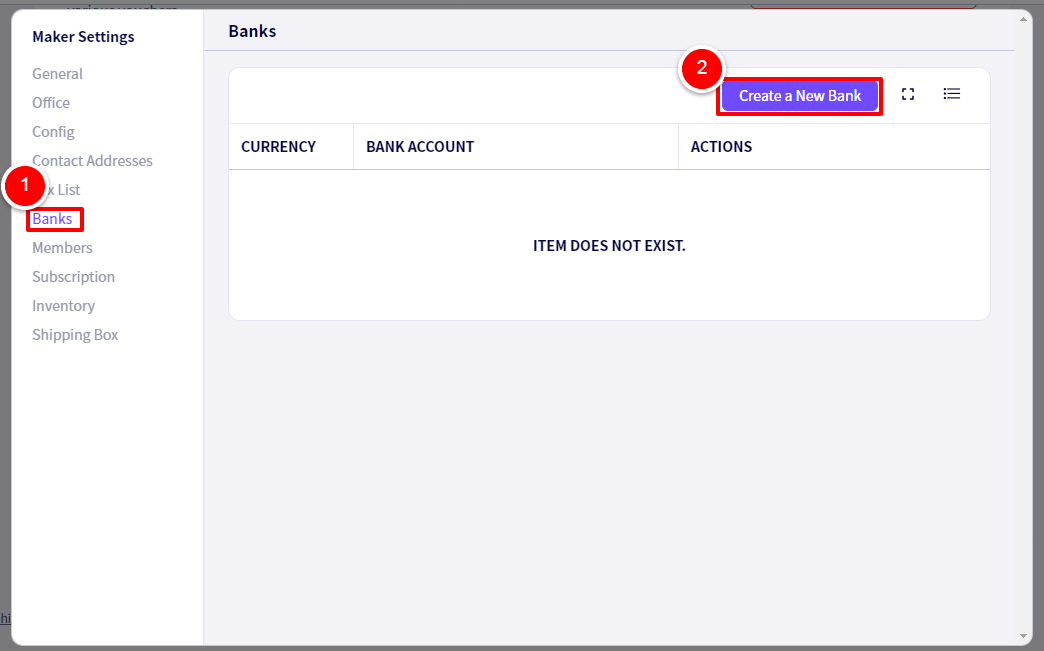
② Click on the purple ‘Create a New Bank‘ button.
you will be directed to this screen after clicking on ‘Create a New Bank‘
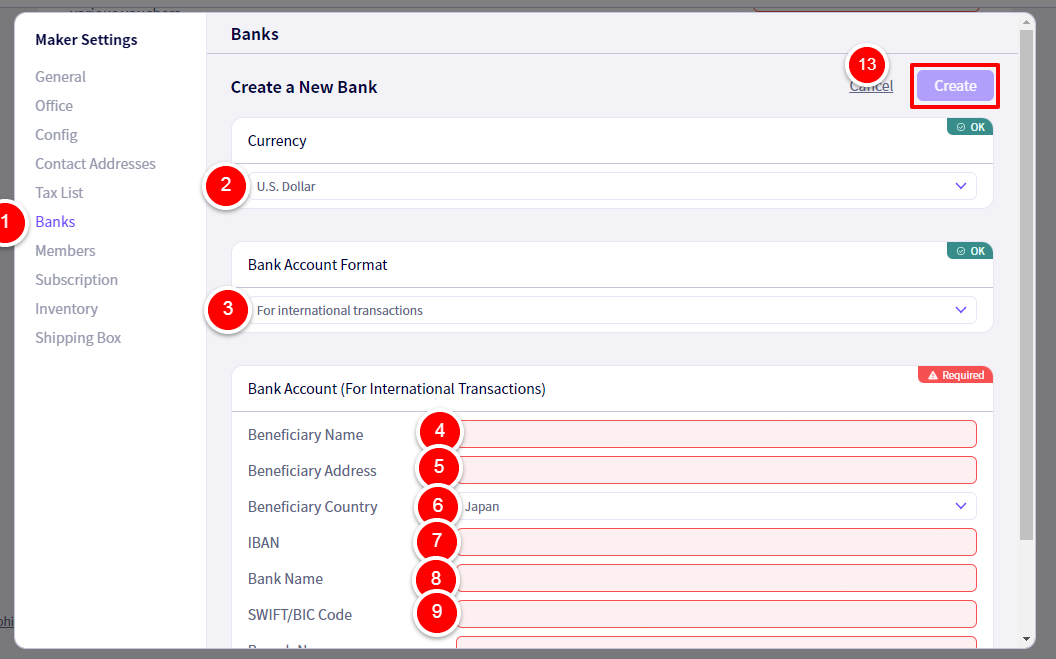
②Enter the currency of the Bank account.
③Set up the ‘Bank Account Format’ here.
※Please choose from ‘For international transactions’, ‘For transactions in Japan’ or ‘Custom Format’
Fill in the information from ④ to ⑪
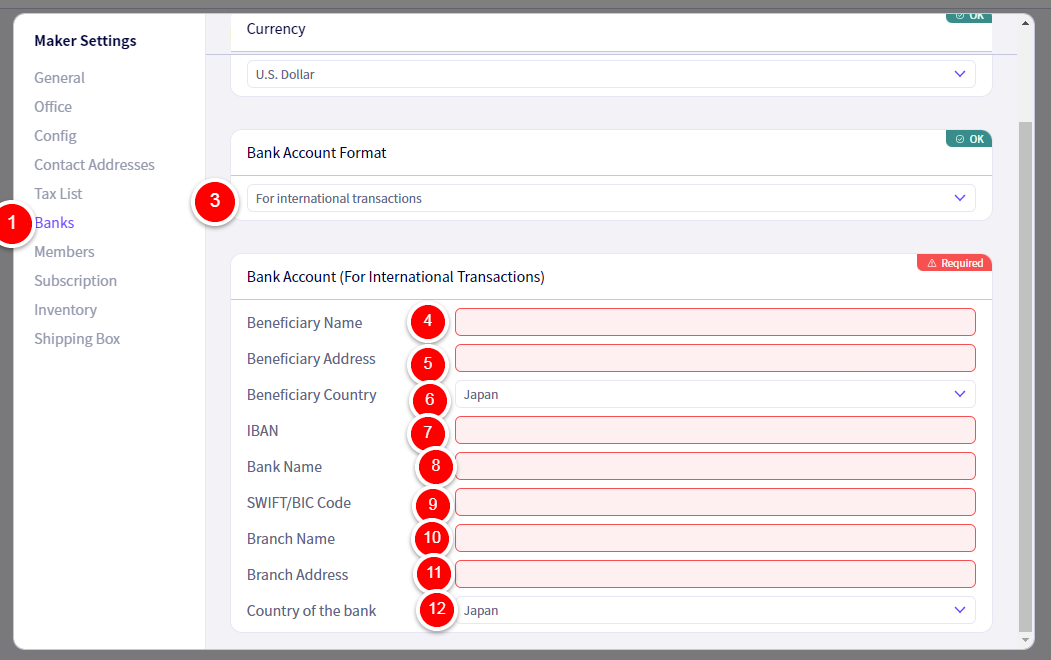
⑦ input IBAN information here.
⑨ Input SWIFT/BIC Code information here.
⑬ Click ‘Create‘ after filling in information between ② and ⑪.
Step 6: Contact Addresses
Here you can set up your Members information. From this sub-heading, you can invite, edit and delete members from your organisation, as well as check invite status.
① Click on ‘Members‘.
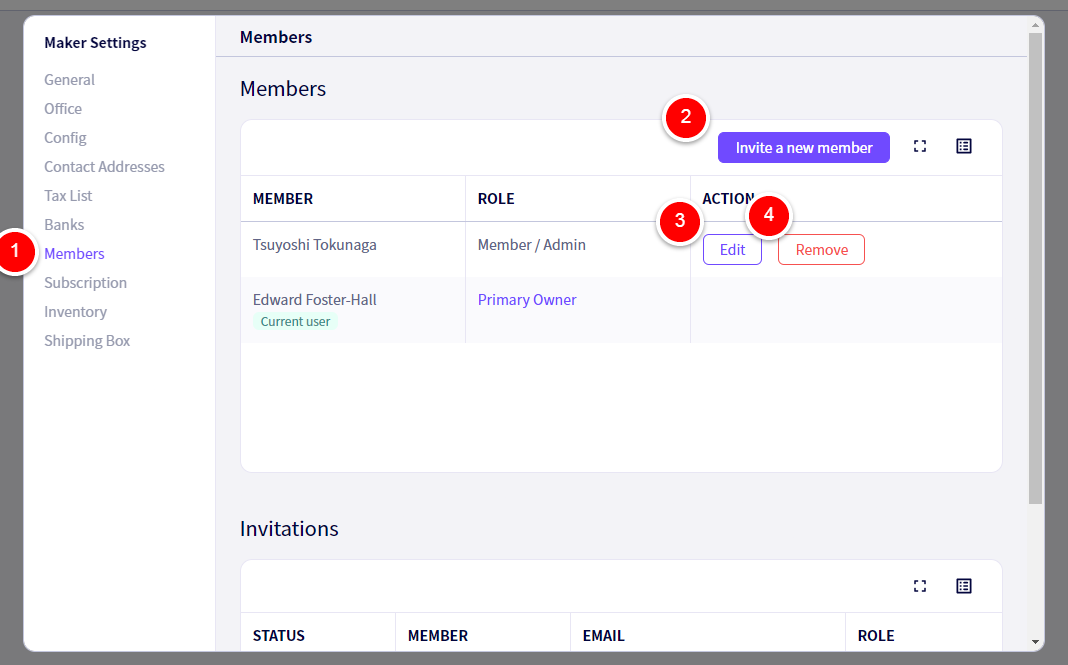
② Click on ‘Invite a new member‘ You will be redirected to the following screen.
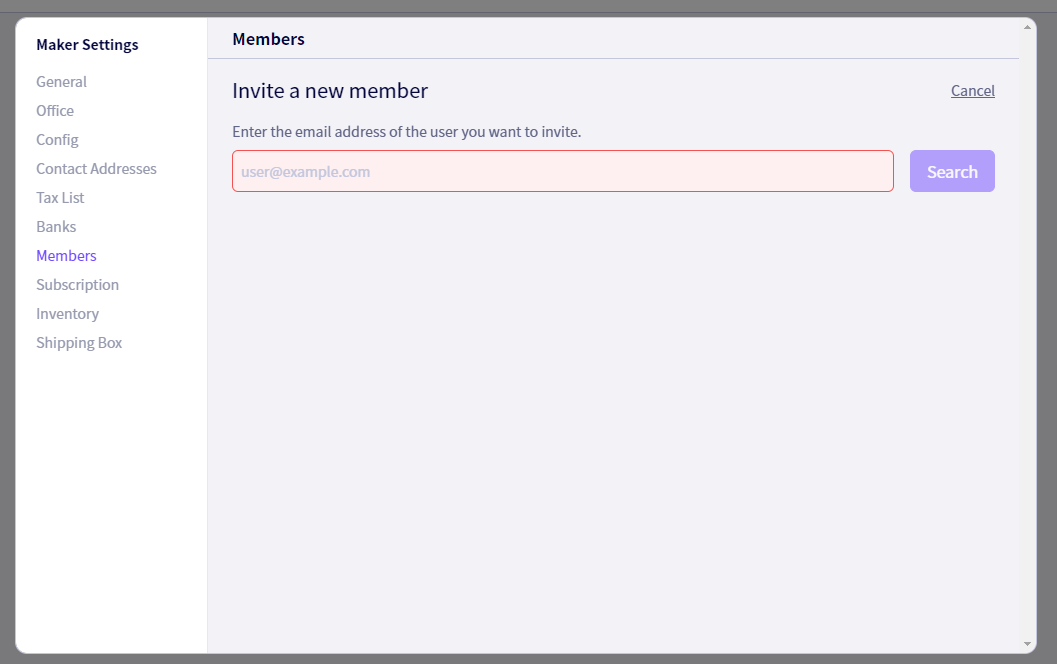
Enter the email addresses of members you wish to invite.
③ ‘Edit‘ Here you can edit individual members privileges.
After pressing the purple button ‘Edit’ you will be redirected to this screen.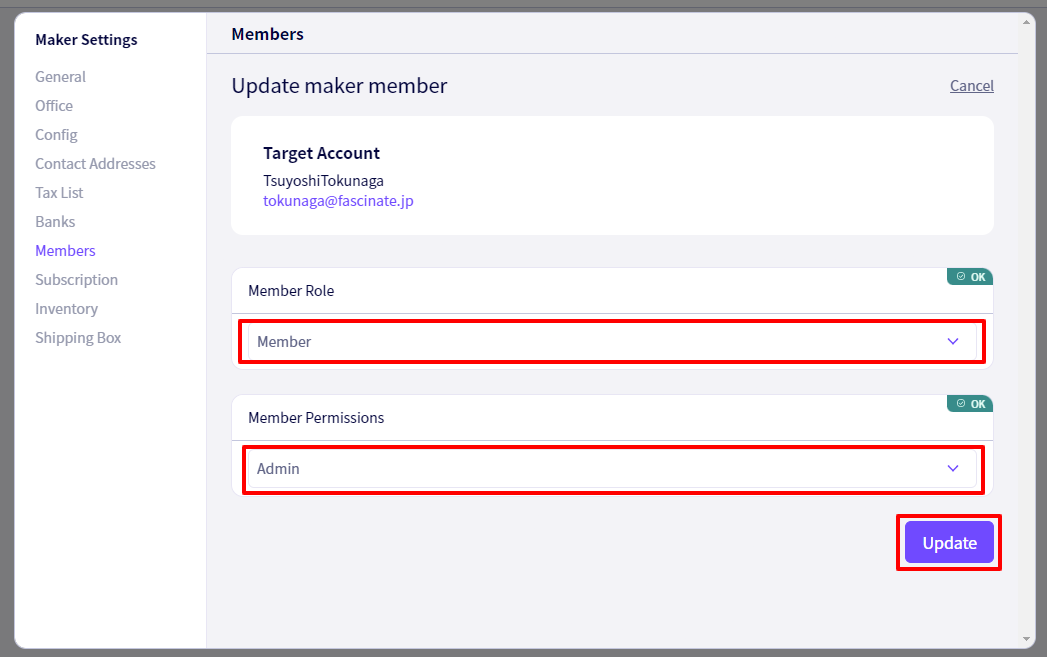
‘Member Role‘ Here you set the member as an ‘Owner’ or just a regular ‘Member’
‘Member Permissions‘ Here you can set the members permission to Admin, Write only or Read only.
※Write only means the ability to edit content.
※Read only means the ability to view content only.
④ ‘Remove‘ This button is used to remove members.
Step 7:Inventory
Here you can set up Inventory Management. This is optional.
① Click on ‘Inventory‘.
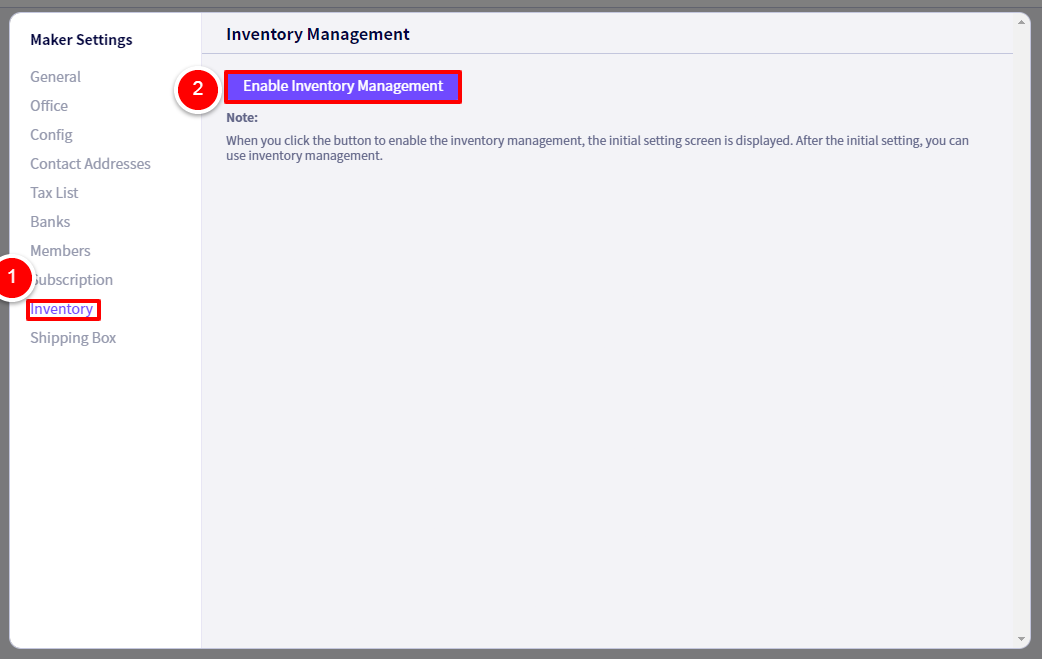
② Click on the purple button titled ‘Enable Inventory Management‘. You will be redirected to the page below.
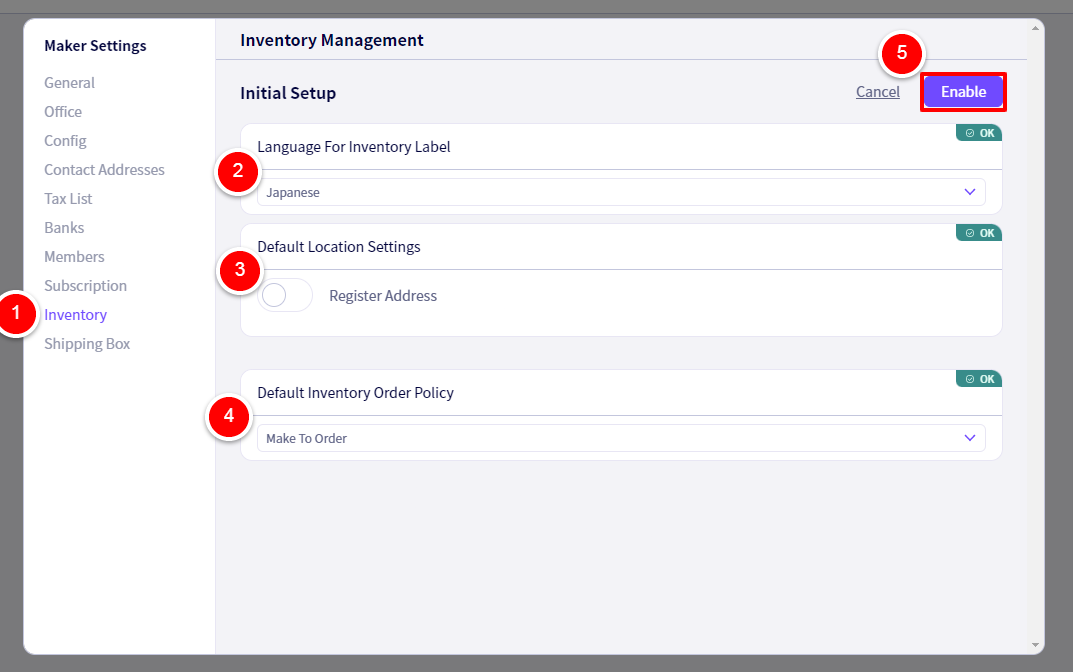
② ‘Language for Inventory Label‘ Select what language you wish to use for labels while using the Inventory Management feature.
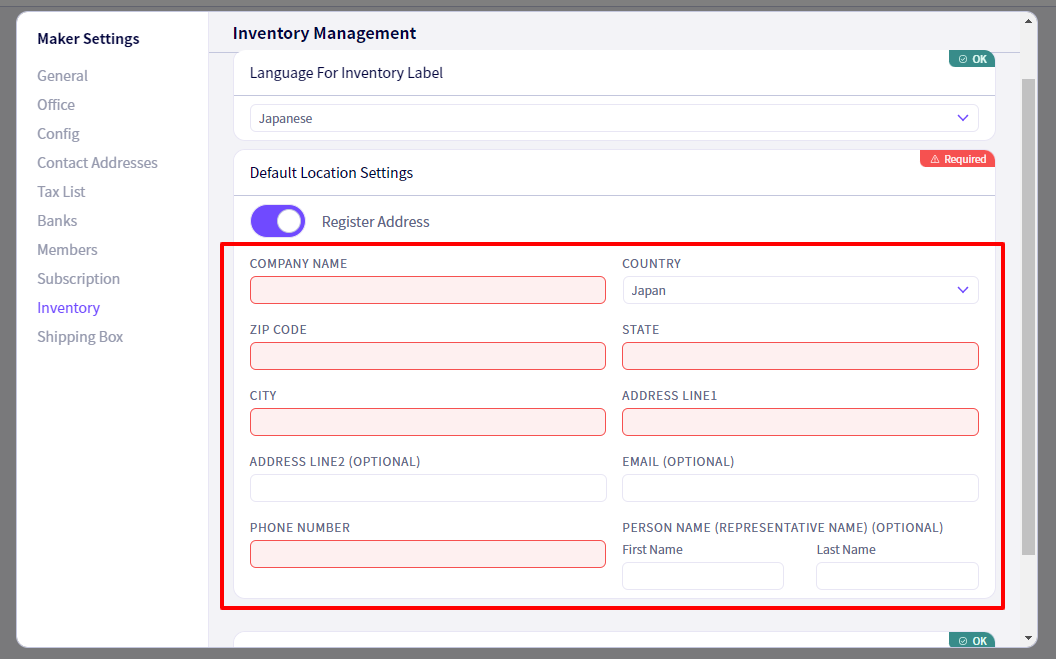
③ ‘Default Location‘ Turn this on if you wish to register a location.
※After turning this feature on you will be presented with the following fields to fill in.
④’Default Inventory Order Policy‘ From here, you can choose what sort of management you would like applied to orders until completion. (Inventory Order, Inventory Order and Backorder, Make to Order, Pre Order)
Step 8:Shipping Box
Here you can set up the Shipping Box function. This is optional.
① Click on ‘Shipping Box‘.
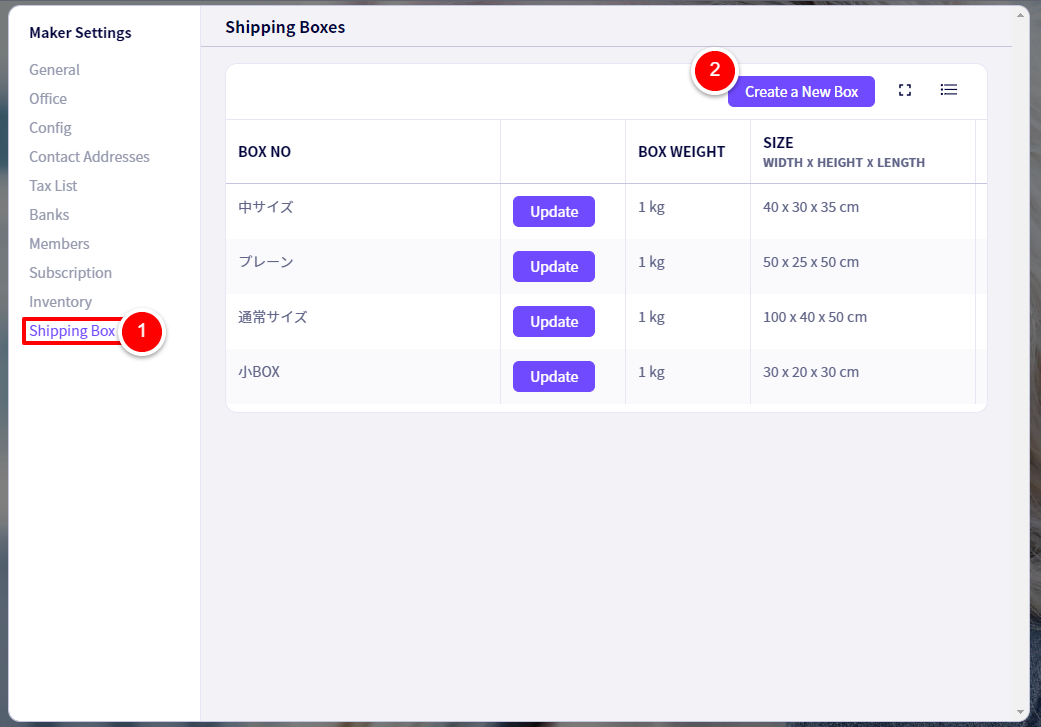
② Click on the ‘Create a New Box‘ button. You will redirected to the page below.
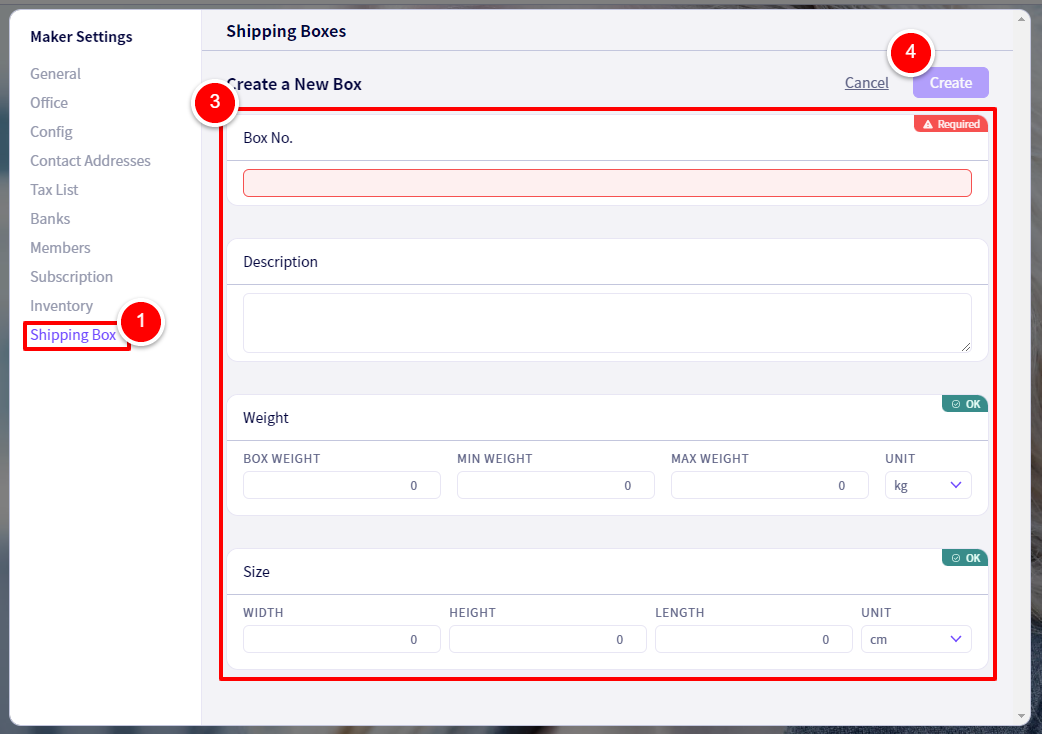
③Fill in all the information in the red box as seen above. Here you can input the Box No., Description, Weight and Size
④ Click on the purple ‘Create‘ button.
If you have any questions, please contact us using the
Inquiry form
If you are in a hurry or need assistance by phone, please contact us at
050-1791-8946