Setting up for product registration
Step 1:SKU Property Settings
Before registering products, you will need to set up the attributes you will give to your products to manage them. For example Color, Size, Categories, etc.
Click on ①’Products‘, followed by
②’Product Attributes‘.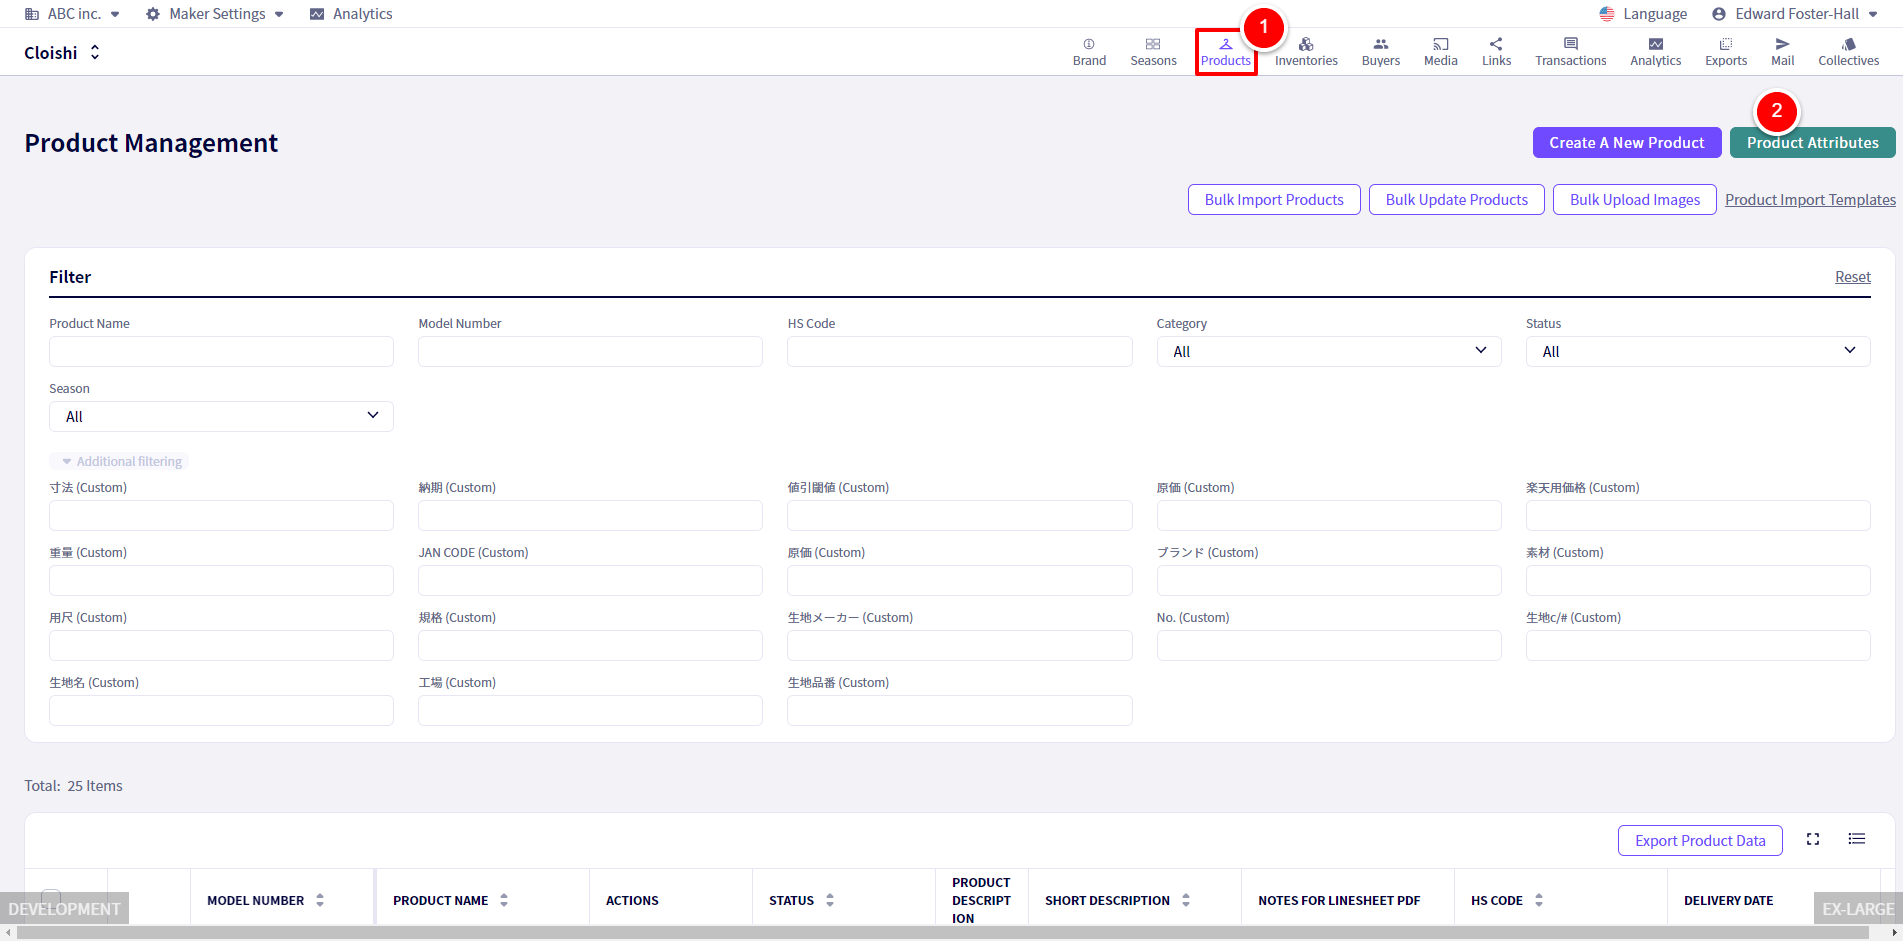
About SKU Property Settings
SKU properties are attributes like color and size you use to manage and differentiate products. For example, you could make SKU properties of ‘Leather’, ‘Color’ and ‘Size’. You can use this combination of properties later when you create a SKU Template, which we will go into later.
Click on ①② ‘SKU Properties‘ in order.
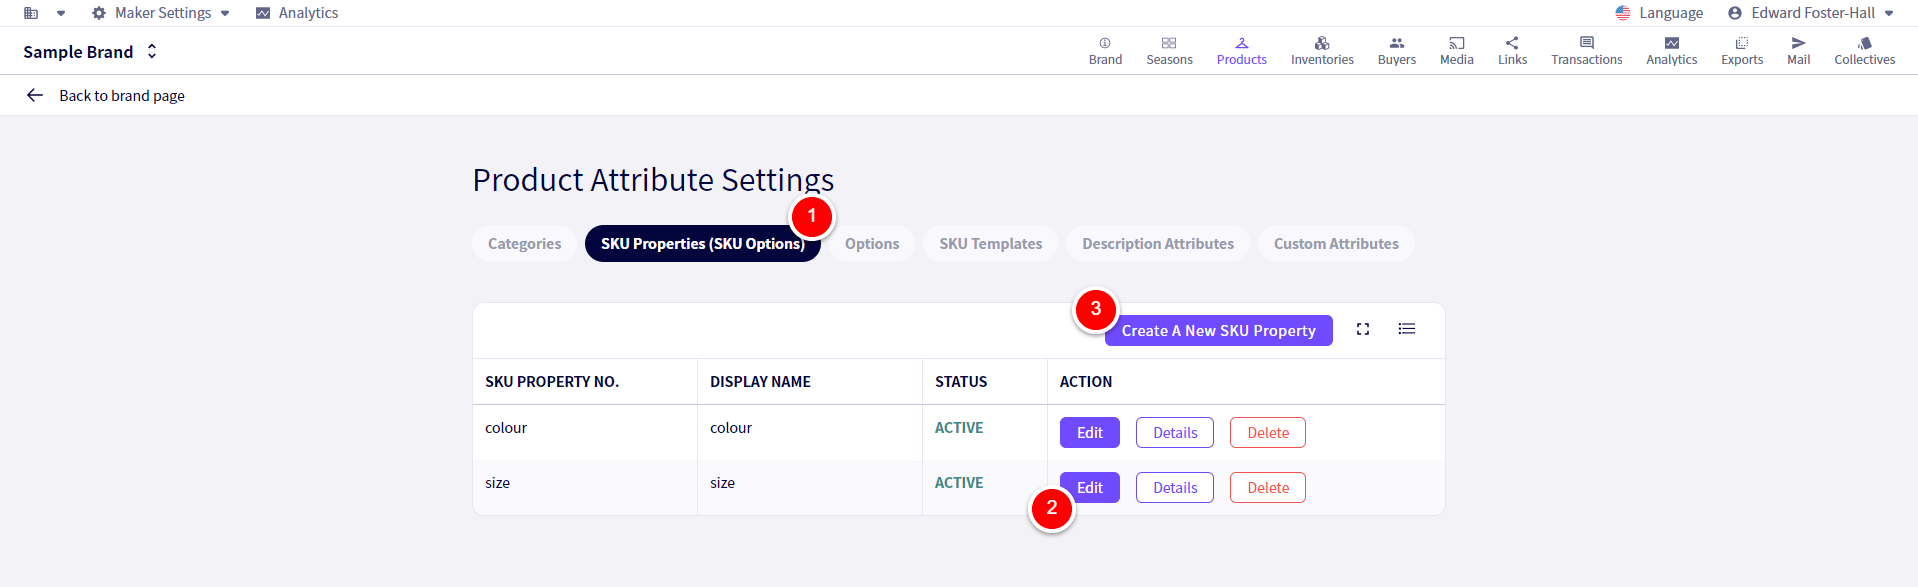
You will be redirected to the following screen.
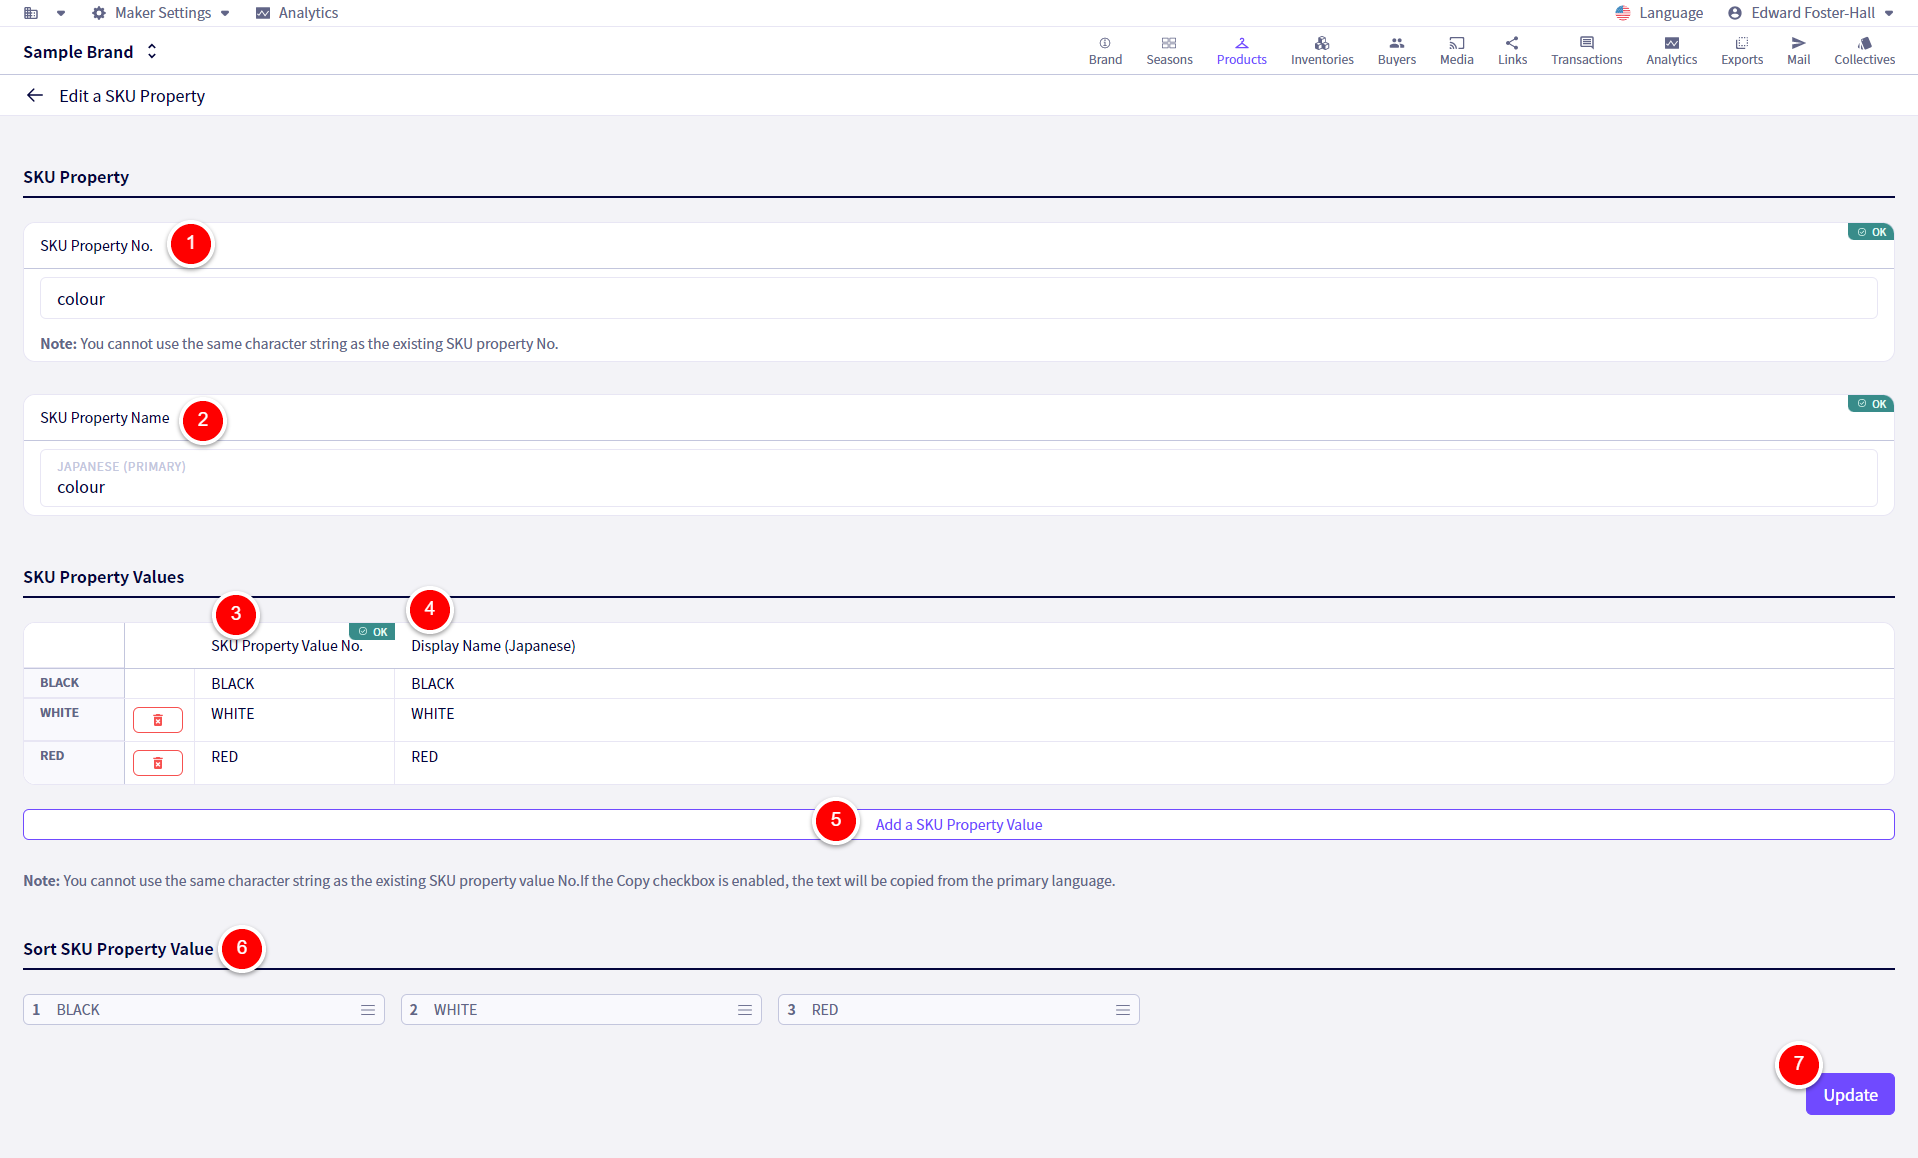
The example above is settings up colours.
① ‘SKU Property No.’This is the name the system will use to recognize this SKU Property, which you will need to use for bulk product registration, etc.
② ‘SKU Property Name’This is the name that will be seen by buyers as part of the products information. It will be reflected on Billing Invoices, etc.
③ ‘SKU Property Value No.’ This is the identifier the system will use. You will need to use it for bulk product registration, etc.
④ ‘Display Name’This is the name that will be shown to buyers and reflected on Billing invoices, etc.
⑤ ‘Add a SKU Property Value‘ If you press this button, you will be presented with more fields for you to add more variations to this property.
⑥ ‘Sort SKU Property Value‘Here you can drag and drop to reorder the values you have added.
① ‘SKU Property No.s’ are identifiers used in databases and systems to differentiate and identify products and their properties. They are used when exporting and importing data into DEXTRE
Click on ⑦‘Create‘
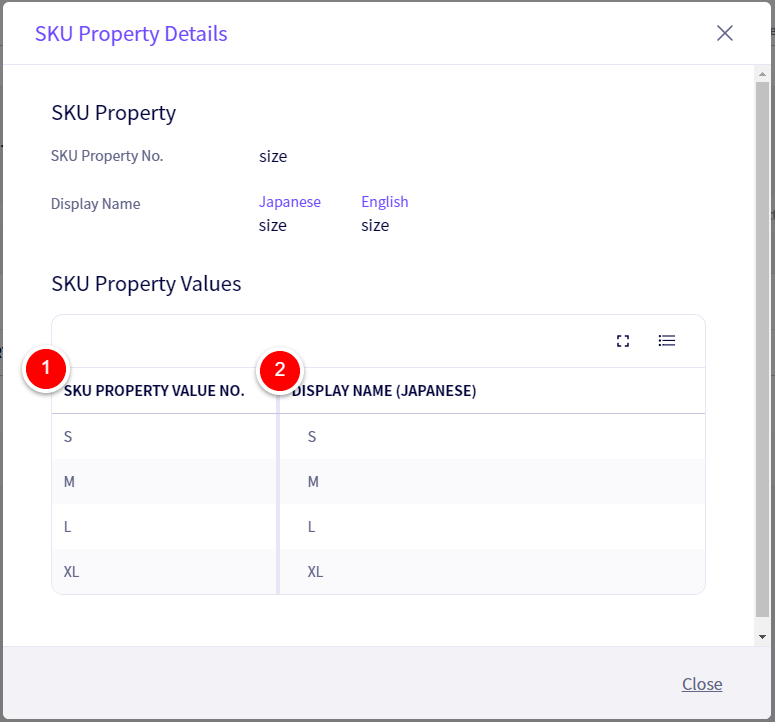
As an example, here is how a size SKU Property could be made.
Put the size code in ①‘SKU Property No.‘ and then the size name in②‘‘SKU Property Name’‘
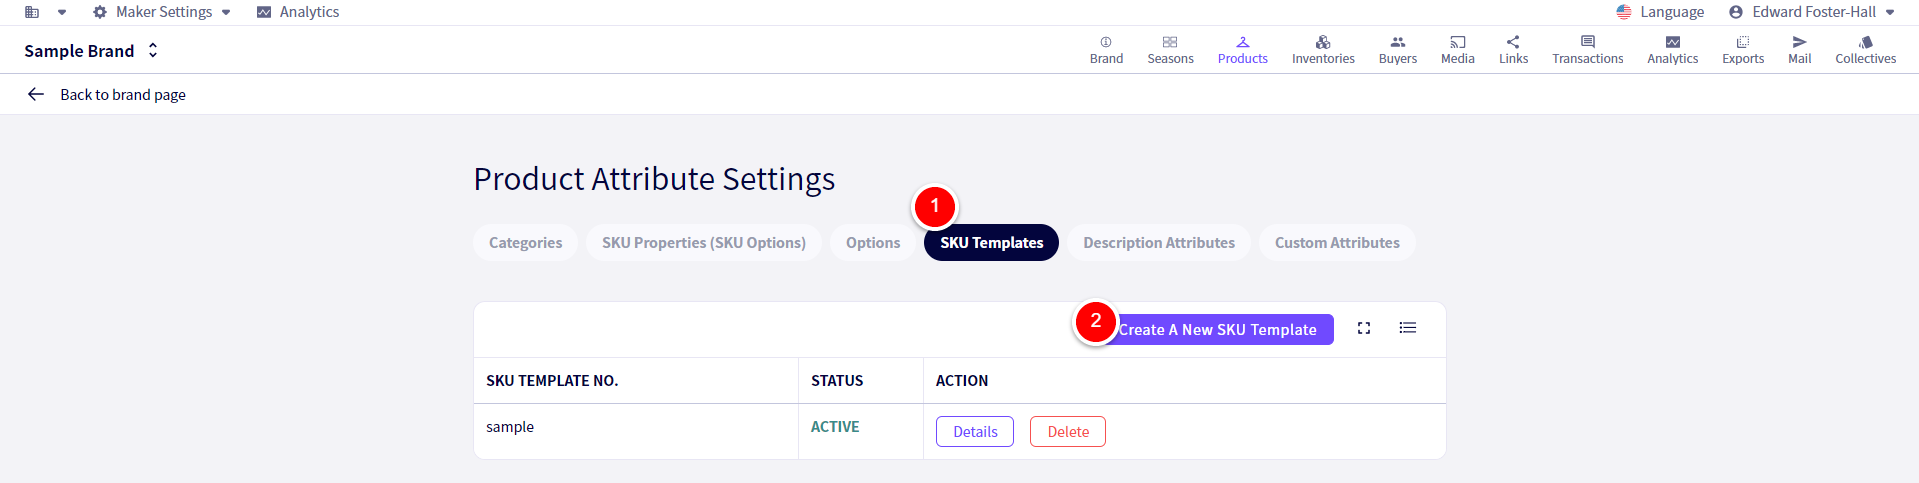
Step 2: SKU Template settings
After you have made the SKU properties you will need, you now need to make a ‘SKU Template‘.
Click on ① , followed by ②
You will be redirected to the following screen.
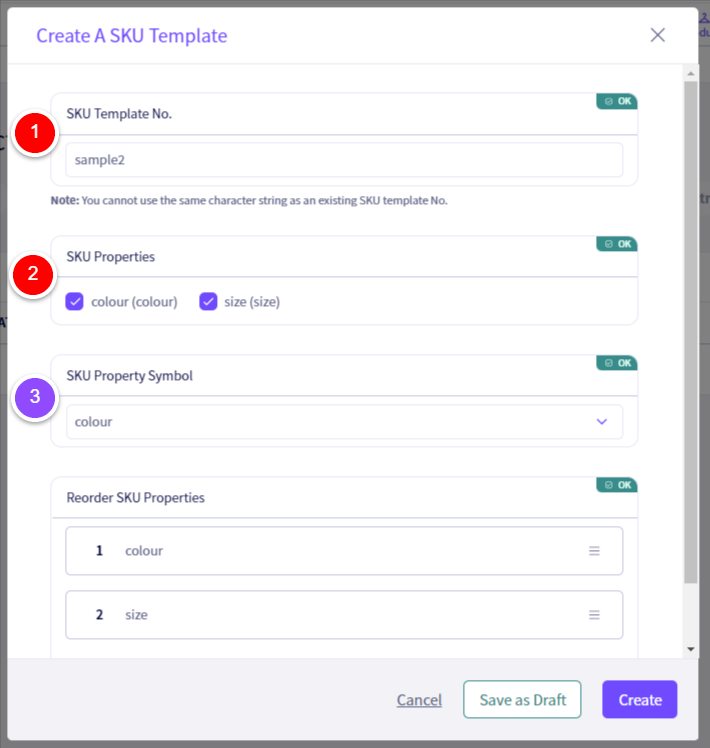
① ‘SKU Template No.‘ Add a name to the template.
② ‘SKU Properties‘ Select the SKU Properties you wish to use to add to this SKU structure.
③ ‘SKU Property Symbol‘ Decide which SKU property you wish to use to organize photos of your products (Color, etc.)
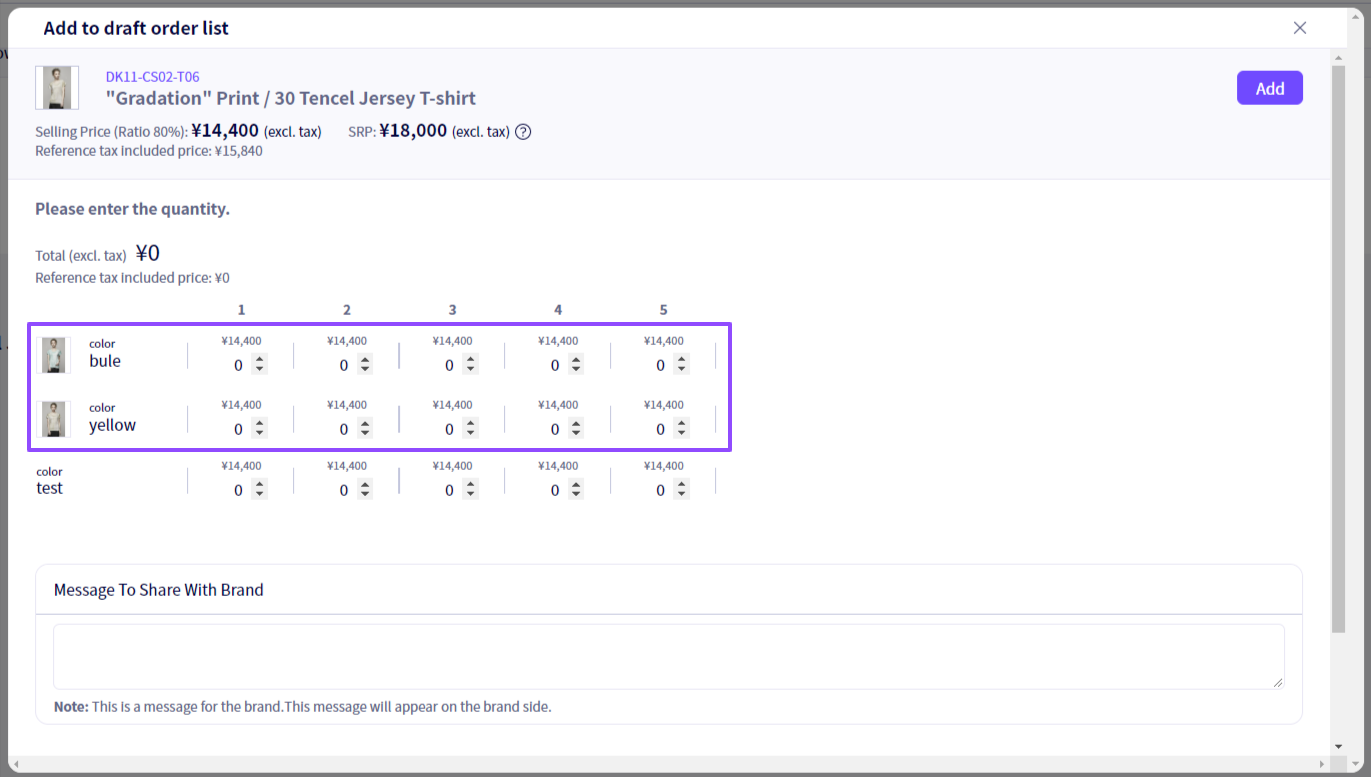
※ Here is an example of the SKU Property Symbol, as seen in the ‘Cart’ section of the Buyer application.
Step 3: Category Settings
Next we will set up Product Attribute Categories.
Categories are attributes that need to be managed by brand. Depending on the brand, the management and way they are displayed will change.
■ Category setup examples
1:Gender categories such as MEN/WOMAN/UNISEX
2:Item categories such as One piece/Jacket/Dress
3:Accessory categories such as Hats/Rings/Wallets
On top of this, you can add subcategories and subsubcategories.
■ A categorization example
1:(Category)WOMAN-(Subcategory)Jacket/Dress/One Piece
2:(Category)WOMAN-(Subcategory)Hat-(Subsubcategory)/CAP/KNIT/BUCKET HAT
We will use the example of:(Category)WOMAN-(Subcategory)HAT-(subsubcategory)CAP/KNIT for the following explanation.
To start, we must first set up the Category (The broadest option)
From ‘Product Attribute Settings‘ select ① ‘Categories‘.
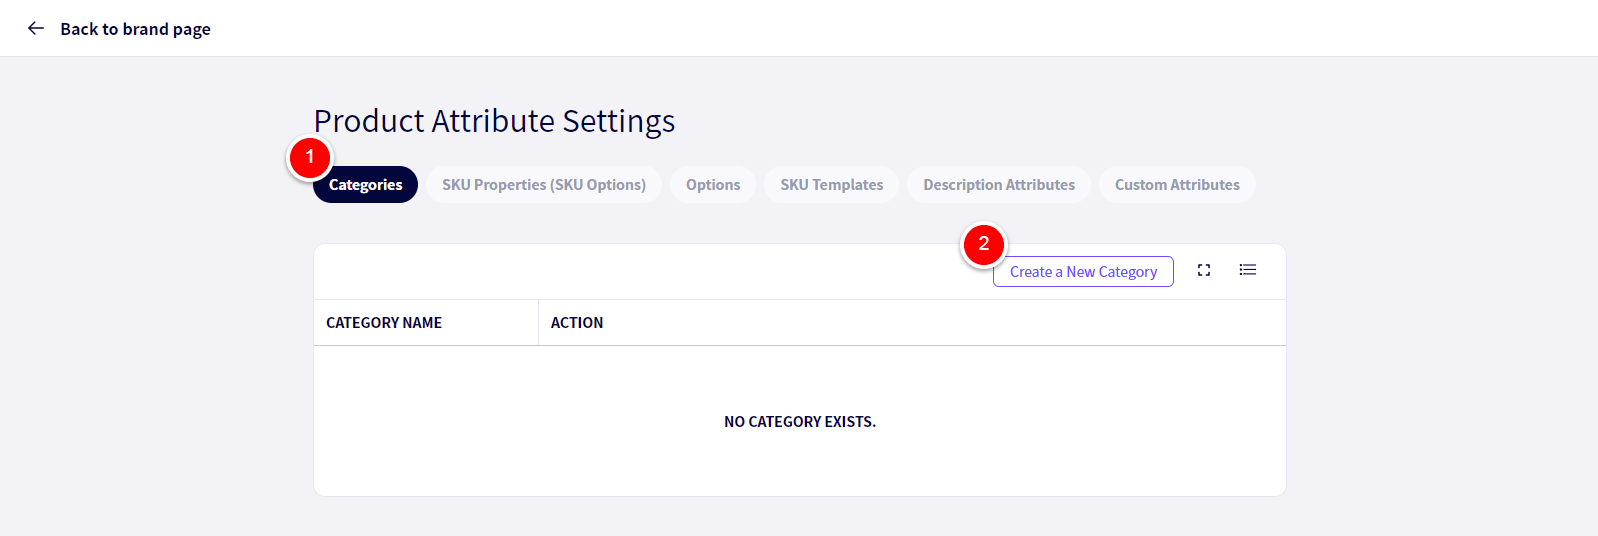
Click on ② ‘Create a New Category‘
Your screen will be redirected to the following.

Next, from the ‘Category Type‘ heading, select ①‘Category‘ from the drop down menu.
Next, enter a ②‘Category name‘(For example, ‘WOMAN’)
After you have done this please click on ③‘Create‘.
Next we will set up our subcategories.
Click on ④’Create a New Category’

You will be redirected to the following page.
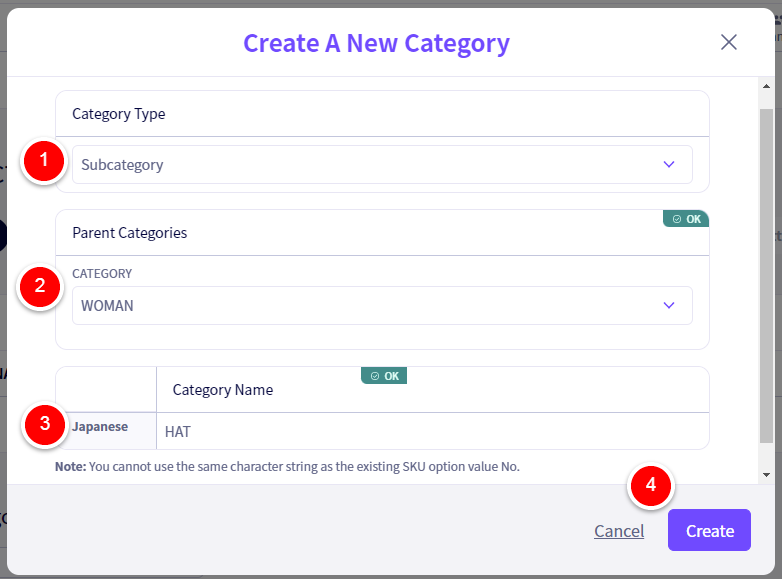
From the ‘Category Type’ heading, Select ⑤‘Subcategory‘ from the drop down menu.
⑥ Select the Category you have just made (in our example ‘WOMAN’)
Next, Enter a ⑦ ‘Category name‘(For example, ‘HAT’)
After you have done this please click on ⑧‘Create‘.
If you have completed the above steps successfully ‘HAT’ Should be indented to the right of, and under, ‘WOMAN’.
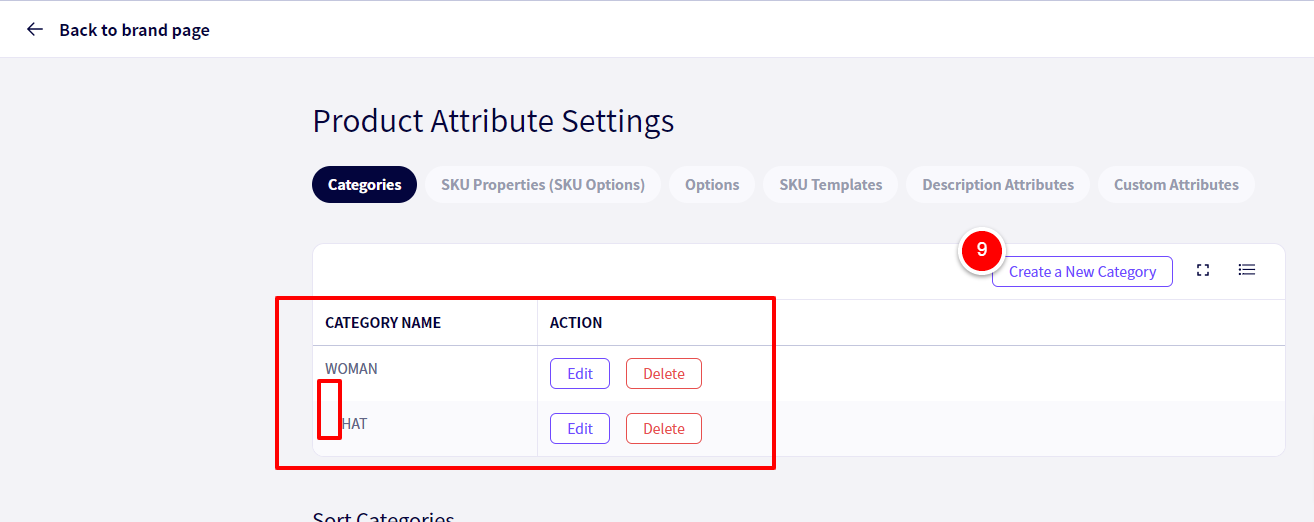
If you wish to further organize your products into categories, you can use Subsubcategories.
Click on ⑨’Create a New Category’ once again, you will be redirected to the following screen.
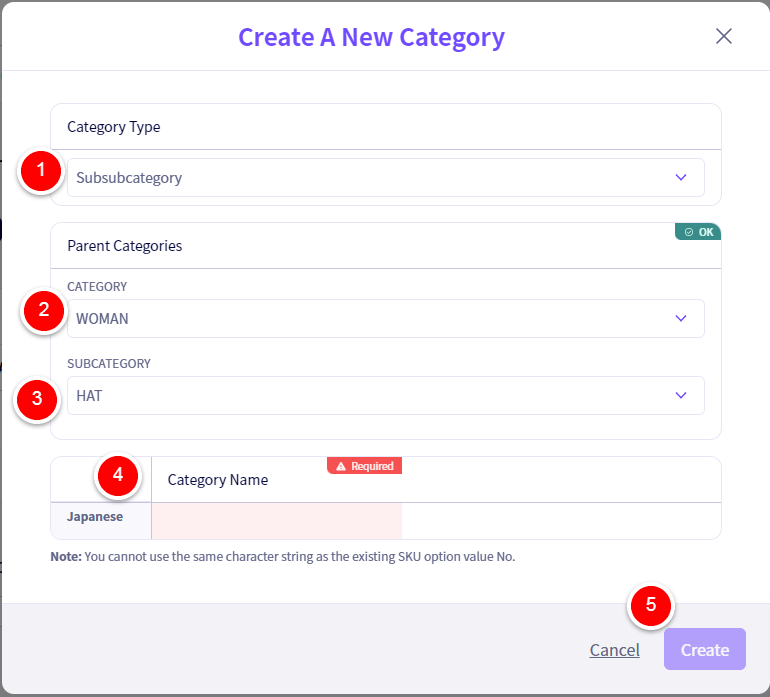
From the ‘Category Type’ heading, Select ⑩‘Subcategory‘ from the drop down menu.
Under the Parent Categories section, select ‘WOMAN’ as the ⑪’Category‘
and ‘HAT’ as the ⑫‘Subcategory‘
Next, Enter a ⑬ ‘Category name‘(For example, ‘CAP’)
You will be automatically redirected to the ‘Product Attribute Settings‘ page, so please check if your Categories, Subcatergories and Subsubcategories are indenting appropriately as seen below.

■ Reordering Categories
At the bottom of the page, you are able to rearrange the order of categories.
* Only the main categories are able to be reordered like this.

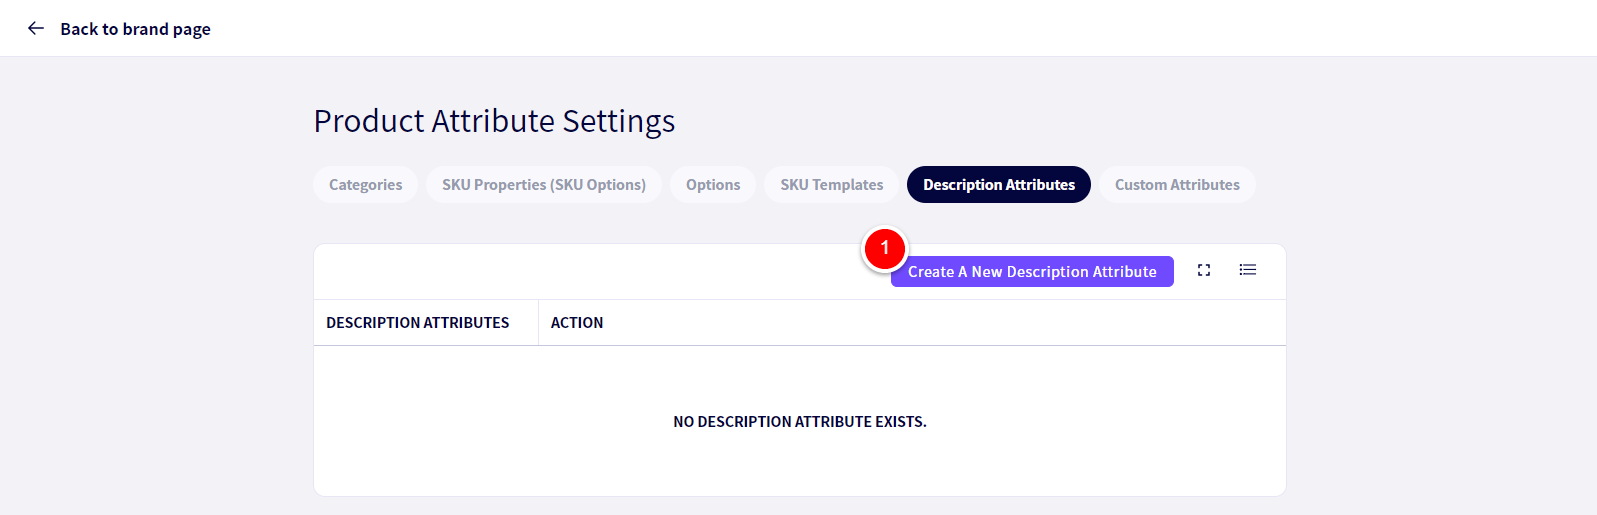
Step 4:Description Attribute Settings
‘Description Attributes‘, Are used when making commercial invoices for exports. They will be the ‘Simple name’ used for products.
※ These Description attributes, after being set up, will need to be applied to each product.
①Click on ‘Create a New Description Attribute‘.
Enter a new ②’Description Attribute‘
For example, enter ‘Mens jacket’ which will be displayed on commercial invoices.
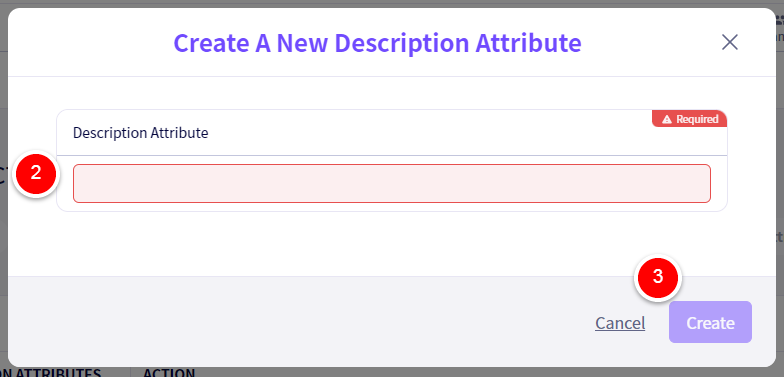
After you are done, click on ③‘Create‘.
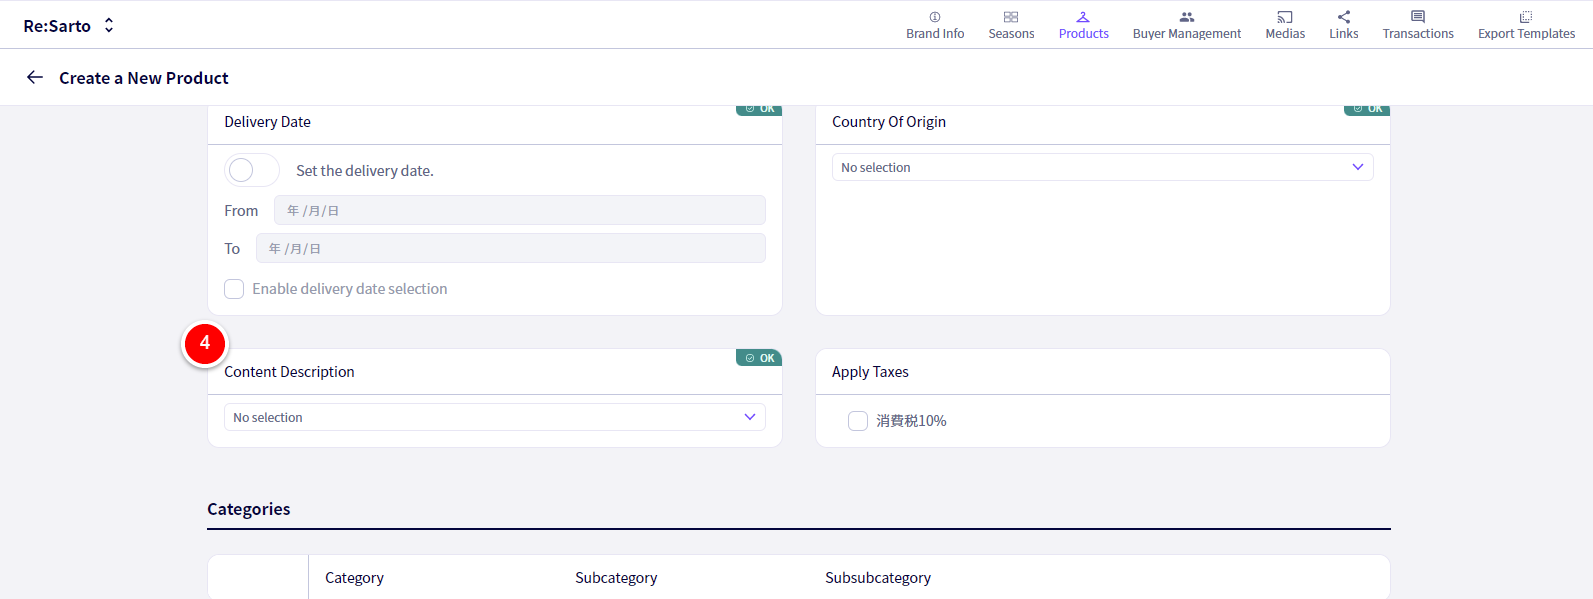
On the ‘Create a New Product‘ page, select the appropriate description from ④‘Content Description‘
Custom Attribute settings
Custom Attributes are pieces of information or flags that you can apply to products freely. They can be set to be displayed or not be displayed to Buyers, so can be used to carry pieces of information over to a product such as the factory it was produced in or the material it is made from.
As an example settings, if we wish to keep track of all products made of a specific material, we will make a Custom attribute called ‘Material1’.
First off, select ①‘Custom Attributes‘.
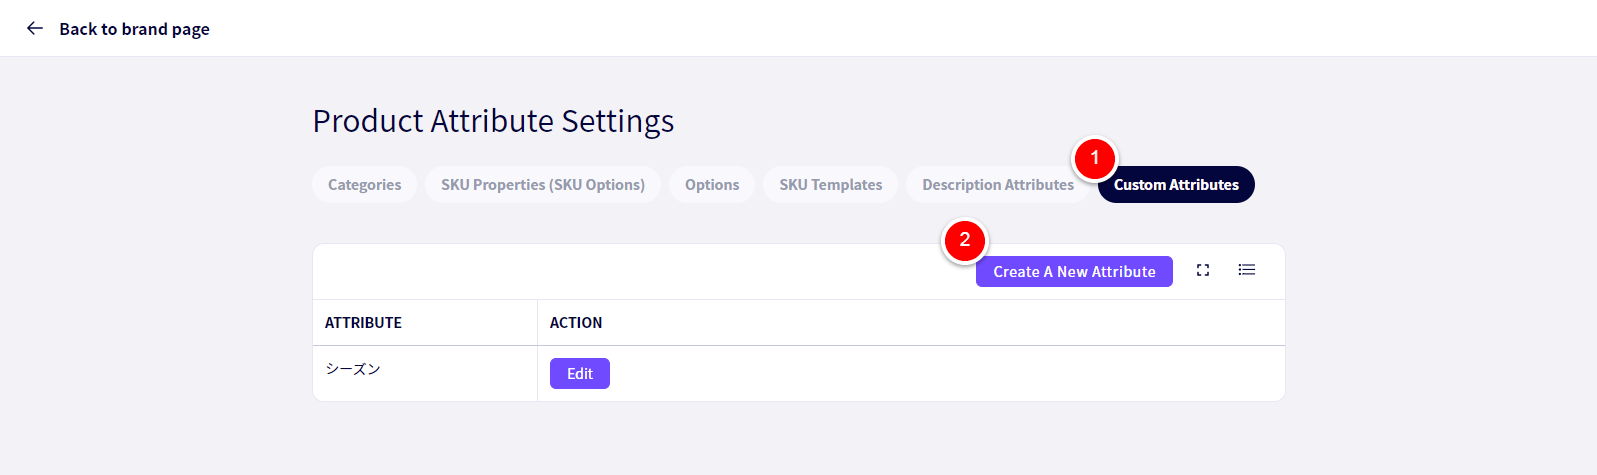
Following that, select②‘Create a New Attribute‘.
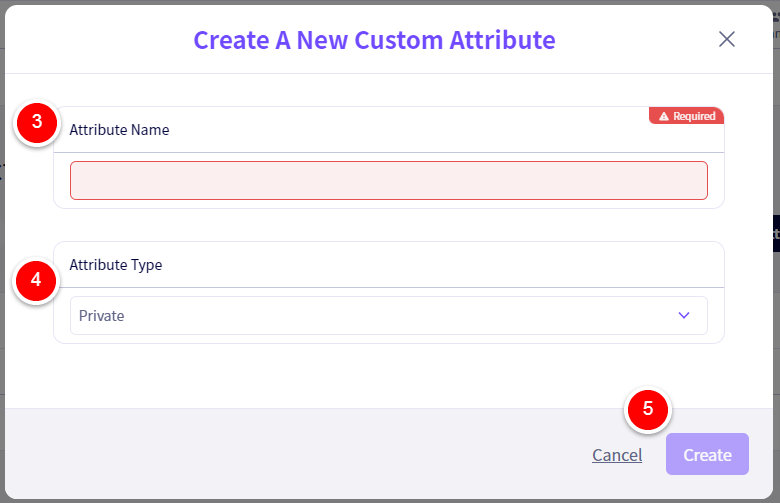
Enter ‘MATERIAL1’ into the ③‘Attribute Name‘ field.
From ④ ‘Attribute Type‘ Select if you want this to be a public or private attribute.
Click on ⑤‘Create‘
If you have any questions, please contact us using the
Inquiry form
If you are in a hurry or need assistance by phone, please contact us at
050-1791-8946