Creating Product Pages
Create a new product
We will now register a new product.
Click on ①‘Products’, then click the purple button ②‘Create a New Product’
From here, we will fill in the basic product information.

① For all your enabled languages, set aProduct Name.
※If you use the ‘Copy’ button, the Product Name will be copied from your Primary language.
② For all your enabled languages, set aProduct Description.
※ If you enable HTML mode, a preview window will appear on the right side.
③ For all your enabled languages, set aShort Description
※ A Short description will be displayed under your products when they are listed.
④ For all your enabled languages, set Notes for Linesheet PDF.
※ Set this to the right amount of characters for optimal display on PDF Linesheets.
⑤ Set aModel Number.
※ The model number will be the identifier the system uses for your product, so this must be unique.
⑥Set aHS Code
※ This is used for commercial invoices. If you have no need for it, feel free to skip this step.
⑦ If you wish to set aDelivery Date turn this switch on and specify the delivery date.
※ You can use the pop up calendar to set the date.
⑧Please select the Country of Origin.
⑨Content Description You may choose a Description Attribute to apply to this product here.
※ These must already have been created from Product Attribute Settings -> Description Attributes.
※ These are used for commercial invoices, for example ‘Mens Jacket’.
Information about how to set Description Attributes can be found here
⑩ Choose whether to apply Tax to this product. Select the appropriate tax setting. These must have already been set up beforehand.
※ These Tax settings are reflected the Tax List settings found under Maker Settings -> Tax List
Information about how to set up Tax in DEXTRE, can be found here.
⑪Categoriescan be set up here. A product may be a part of multiple categories.
※ You may choose categories from those already set up under Product Attribute Settings -> Categories.
Information about how to set up Categories can be found here
⑫ Select a SKU Template here.
※ You can choose SKU Templates you have already made from Product Attribute Settings > SKU Templates.
Information about SKU Templates can be found here
⑬ Option Settings If you wish to turn on the ability to add ‘Options’ to this product, please enable this switch.
※ You may choose Options from those already set up under Product Attribute Settings -> Options.
Information about Options can be found here
⑭ Set a Manufacturing cost here.
Only your default currency can be used to set this value.。
⑮ Set a Retail Price for this product here.
※ This can be set for each individual SKU.
⑯ If you are set up to use Wholesale Price / Recommended Retail Price、Set the (nominal) retail price as the Wholesale Price / Recommended Retail Price.
※ This can be set for each individual SKU.
⑰ If using FOB, set the price to the wholesale price.
※ This can be set for each individual SKU.
⑱ Materials can be added here(There is no particular limit on the amount of Materials you wish to register to a product.)
※As an example, Parts Name :MAIN / Material Name 50% Wool 50% Cotton / Article(Customs classification)WOVEN
※ The Article(Customs classification)section is used for commercial Invoices.
⑲ Metadata can be added here.
※You may choose Metadata from those already set up under Product Attribute Settings -> Custom Attributes.
※ If all SKU’s will carry the same data, please set this here.
Information on Custom Attributes/Metadata can be found here
⑳ Custom SKU Metadata can be set here.
※ You may choose Metadata from those already set up under Product Attribute Settings -> Custom Attributes.
※ If different SKU’s will carry different data, please set this here.
Information on Custom Attributes/Metadata can be found here
㉑ Images can be added here.
The order to upload images is as follows:【Select An Image】>【Upload an Image】> 【Select an image】> Select an image from your computer > Open > 【Upload】
■ Regarding reordering images
Images can be dragged and dropped to rearrange the order
■ Turning on[Display caption form for images] will allow you to add a caption for each of your images.
As an example, Model 180cm 75kg, Dress Size XL
For more details regarding this, look はhere
■ Turning on[Enable customization of images to be displayed in the product list view]Will allow you to specify up to two images to be displayed in product list view.
■ Turning on[Enable customization of images to be displayed in LinesheetPDF]Will allow you to specify up to two images to be displayed in PDF Linesheets.
㉒ Videos can be added from here.
※After clicking on【Add】button, follow the instructions listed here
㉓360° Image Url can be added here.
※ Please paste in a URL to an already uploaded existing 360° Image.
㉔ Images by Symbol
Follow the same process as for uploading images; 【Select An Image】>【Upload an Image】> 【Select an image】> Select an image from your computer > Open > 【Upload】
㉕ After filling in all relevant information, click the purple【Create】 button. and you will have created/registered a product on DEXTRE!
Duplicating a product.
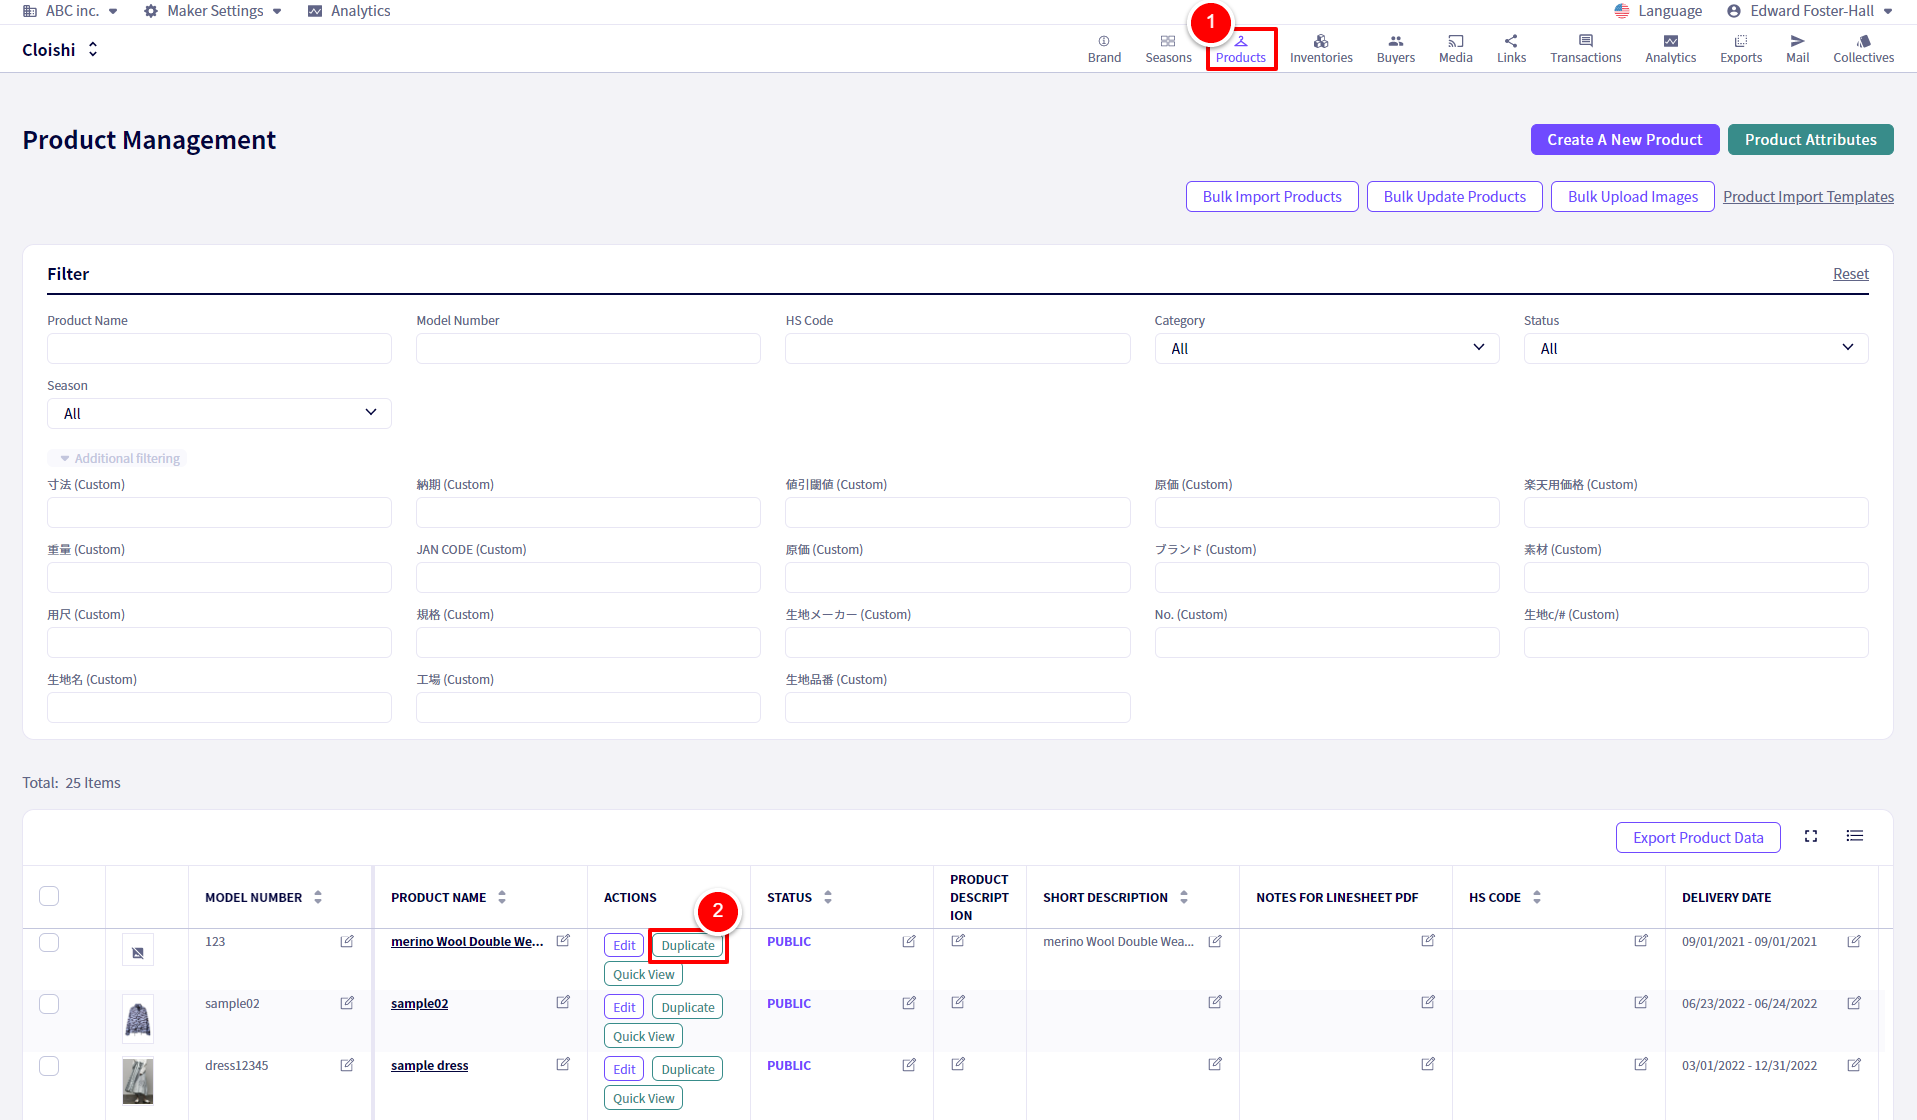
Here we will duplicate a product.
Navigate to ①‘Products‘, then click on the green ②’Duplicate‘ button next to the name of the product you wish to duplicate.
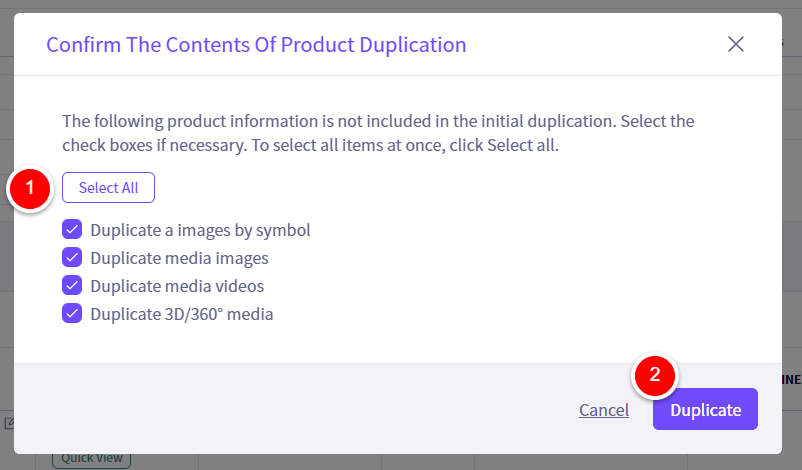
① Select all the optional items you wish to duplicate, then click on the purple ②’Duplicate‘ button.
Now we can once again register basic information about this product.
①Set a new Model Number for this product
※ This must be unique to this specific product.
After completing all of the fields as described in the previous section, click on the purple ②’Create‘ button.

You have now duplicated a product, then registered the duplicate.
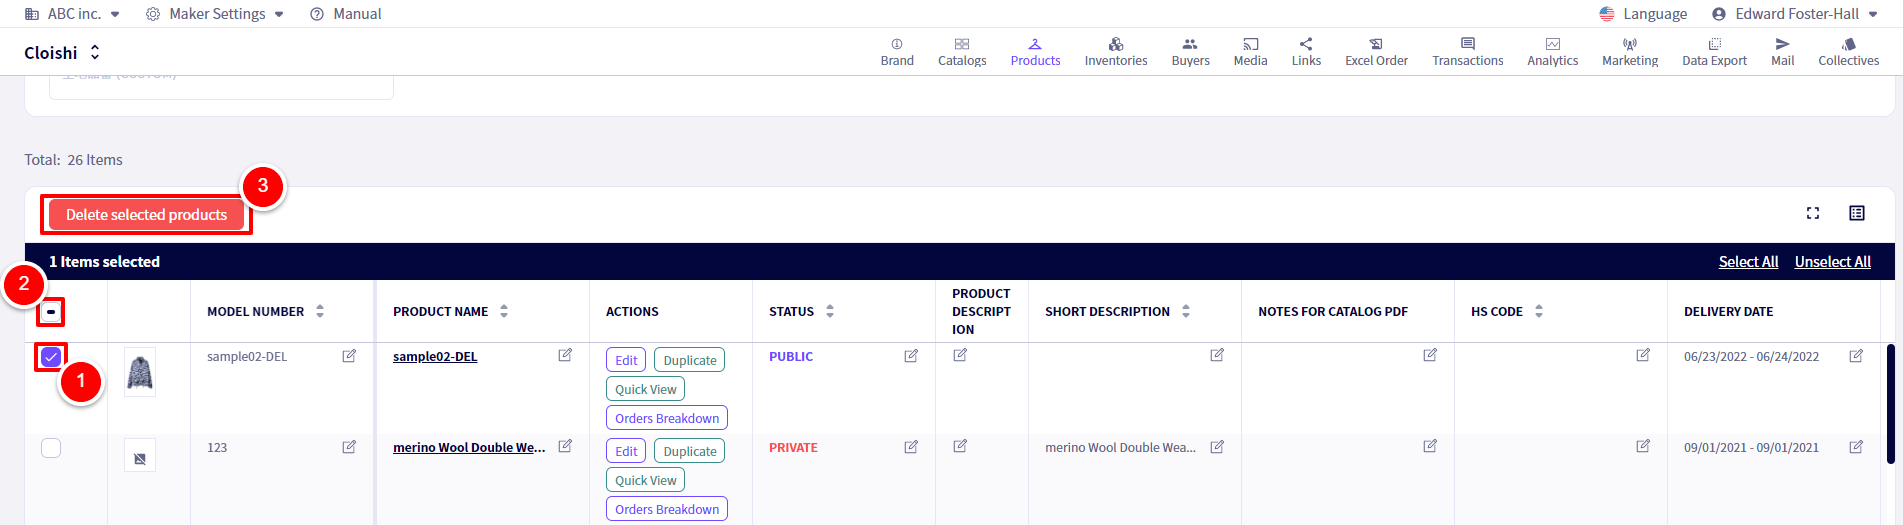
Deleting products
①Select the item or ②select all items, followed by clicking on ③【Delete selected products】
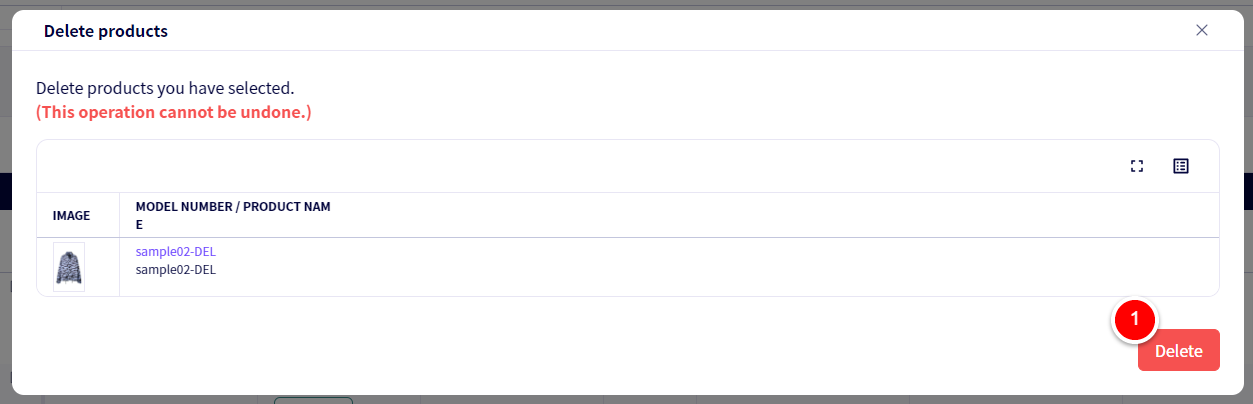
Finally, click on ①【Delete】
If you have any questions, please contact us using the
Inquiry form
If you are in a hurry or need assistance by phone, please contact us at
050-1791-8946