Bulk Product Registration
Creating a product import template
DEXTRE is a user-defined type system.
First, we must create an import template set up for the data we wish to import.
※ A sample template, already filled out, is available to download below.
Click on ① ‘Products‘ followed by ② ‘Import Templates‘.

You will be redirected to the following page.
Select ① ‘Create New Bulk Create Template’

■ We can now create an import template set up for the data we wish to import.(Not everything that can be selected is required to be, only select the types of data you wish to import).
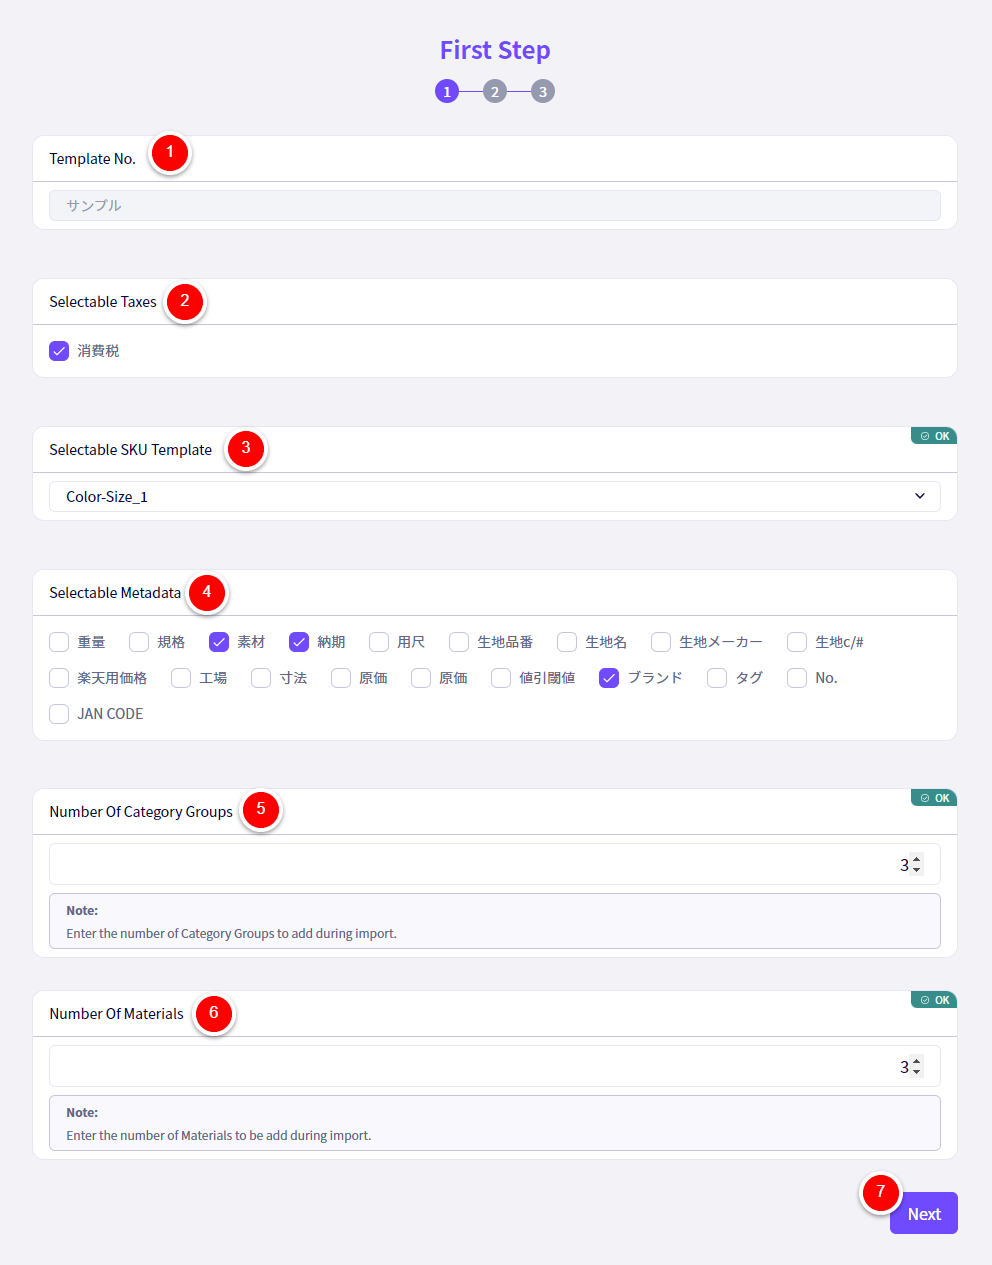
① Template No. Set a name here.
② Selectable Taxes Enable this if you wish to apply Taxes.
③ Select an SKU Template
④ Selectable Metadata Select all metadata (Custom Properties) you wish to have available to the products you are going to import.
⑤ Enter theNumber of Category Groups to add during import.
※A Category group is defined as one set of ‘Category -> Subcategory -> subsubcategory’
For example,
❶ Category 1 : Mens > Subcategory 1 : Outer > Subsubcategory 1 : Jacket
❷Category 2 : Collaboration
In a case like the above where you wish to apply those categories to a single product, enter2
Even selecting 2, not every product will need to be in two, or even any category when you import the information.
⑥ Enter theNumber Of Materialsyou wish to have available to the products you are going to import.
※A Material is defined as one set of ‘Material Type -> Material Name -> Material Parts Name’
For example,
❶ Material_PartsName1 :Main / Material_Name1 : Wool 50% Cotton 50% / Material_Type1 : KNIT
❷ Material_PartsName2 :Lining / Material_Name2 : Cupra 100% / Material_Type2 : WOVEN
❸ Material_PartsName3 :Sleeve Lining / Material_Name3 : Cupra 100% / Material_Type3 : WOVEN
In the above case enter3
Even selecting 3, not every product will need to have three, or even any materials when you import the information.
■ You can customize the header names to your liking.
After customizing the ① Column Names to your liking,click on ② ‘Create’.

Downloading the excel template
■ Excel templates can be downloaded from Import Templates
Select, ①‘Bulk Create Products‘ the click ②‘Download‘ for the applicable template.
a file with the name product_bulk_create_import_日付OOOO-O-OO.xlsx will be downloaded.

A sample template, already filled in, can be downloaded below.
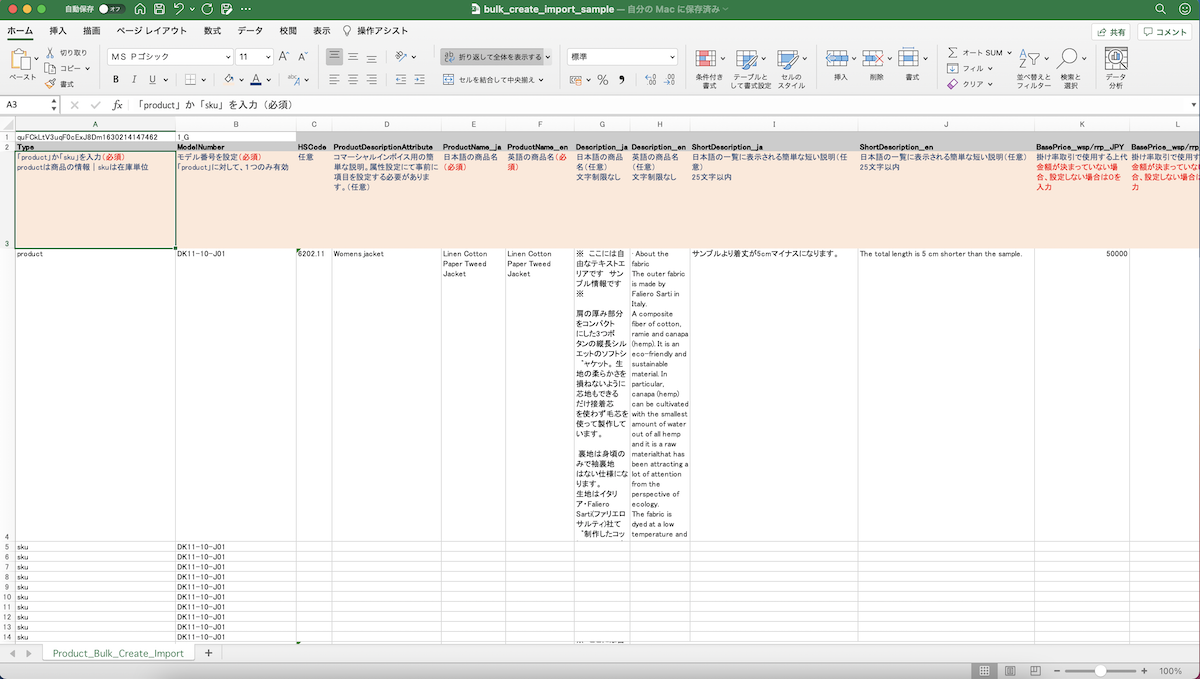
Uploading the completed excel template
After downloading the excel import template file, complete it with the appropriate data and then follow the below steps and upload it to DEXTRE.
Go to ① ‘Products‘, then click ② ‘Bulk Import Products‘.

Click on ① ‘Select a XLSX File‘
Select the completed excel template,
then click the ②‘Import‘ button.
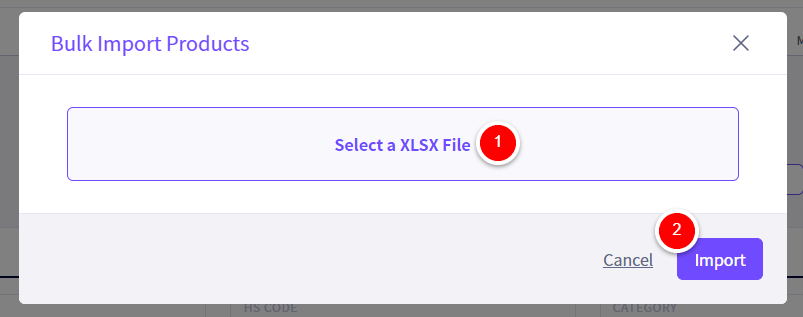
If after this your products are still not visible, refresh the page
For Windows「F5」
For Mac「Command」+「R」
Using the Excel product master
To Use the Excel product master, you will first have to make sure the settings match those on DEXTRE.
Download the Template below.
First, the required settings. When opening the product master in Excel, be sure to enable Macros.

② Here you will need to set the filename for the file that will be exported, ready to upload to DEXTRE.
③ Enter the TEMPLATE ID and VERSION. This can be found on the「Product Import Template Management」page, as well as in the import file downloaded by DEXTRE, in A1 and B1.


| The TEMPLATE ID goes in A18, while the VERSION goes in B18.
|  |
Next, open the sheet named ④【Selectables】

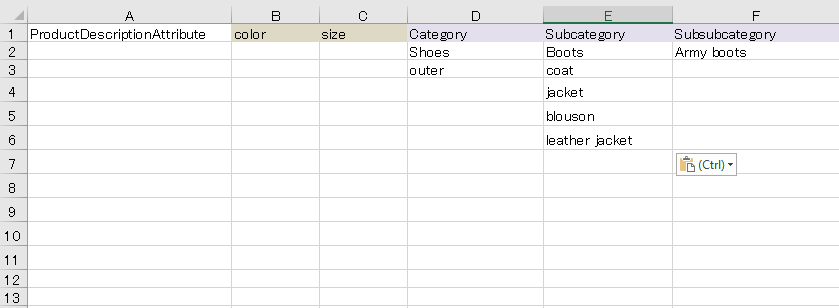
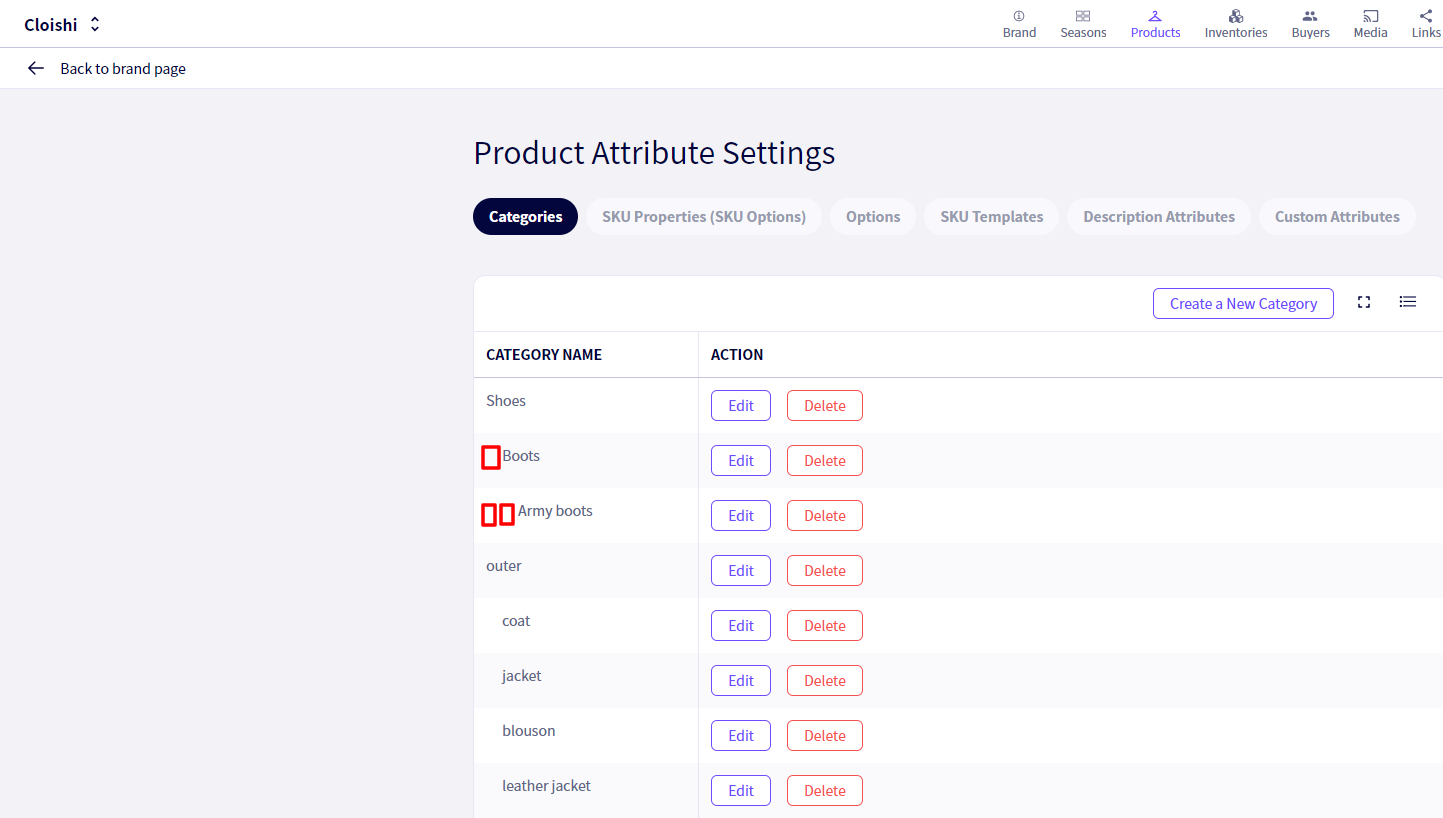
⑤Input the Categories you have DEXTRE to be able to choose them while inputting product data. You can check or add categories on DEXTRE from the【Product Attributes】page.
| Make sure to input the categories, subcategories and subsubcategories correctly.
|  |
Next, open up the sheet labelled ⑥【Basic Settings】

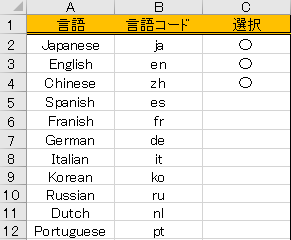
⑦Now we will need to set the languages to be same as on DEXTRE. Put a 〇 in the C column corresponding to the relevant languages. This will also need to be in the same order as the import template.
| From column E in the Import Template, Product Name columns exist per language. In this example the order is jp, en, zh(Japanese, English, Chinese)
| Example
|
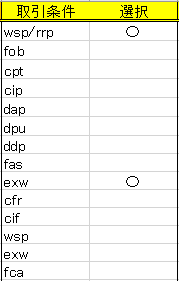
⑧ Now we will need to set the transaction terms to be same as on DEXTRE. Put a 〇 in the E column corresponding to the relevant transaction terms. This will also need to be in the same order as the import template.
| In the import template, After the final【NotesForPDFLineSheet】column, You will see many columns lined up called【BasePrice】In this case we can see the order of the transaction terms is wsp/rrp, exw.
| Sample
|
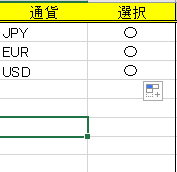
⑨ Now we will need to set the currencies to be same as on DEXTRE. Put a 〇 in the G column corresponding to the relevant currencies. This will also need to be in the same order as the import template.
| In the import template, After the final【NotesForPDFLineSheet】column, You will see many columns lined up called【BasePrice】In this case we can see the order of the currencies is JPY,EUR,USD.
| Sample
|
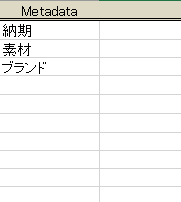
Now we will need to set the Custom Attributes to be same as on DEXTRE. This will also need to be in the same order as the import template, or on the 【Product Import Template Management】screen
| Make sure the order is identical.
| Sample
|
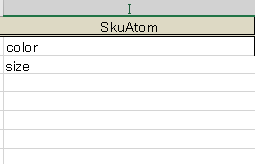
Next, make sure to input the SKU Properties in the correct order to match the SKU Template you are using to import products. Input these into column I.
| After the【SkuNo】column in the import template, there are【SkuAtomValueNo】columns. Here you can see the order is color, size.
| Sample
|
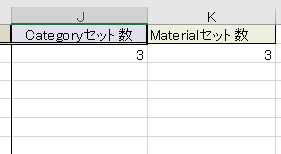
⑪Match the correct amount of Category Sets and Material Sets to the import template on DEXTRE. This can be checked on the【Product Import Template Management】page.
 | Sample
|
⑫ Once done, return to the【Main Settings】page.
Creating the required sheets
Once finished with settings, click on ①【Create export_tp】followed by ②【Create Product Master】

Enter the data required
Next, open the sheet named【Product Master】
A filled in example is available below, with explanations for each column.
Data can be entered with 1 row relating to 1 model number. In this case, SKU variations can be expressed by entering SKU properties separated by commas, as shown in AA2 below.
Data can also be entered with 1 row related to 1 SKU. In this case, Information that doesn’t change by SKU, such as the Product name, only needs to be entered once, as shown in rows 6 and 7 below.

Exporting and uploading the resulting file
Once you have finished inputting product information, return to the sheet named 【Main Settings】and click on ①【File export】

Go to ① ‘Products‘, then click ② ‘Bulk Import Products‘.

Click on ① ‘Select a XLSX File‘
Select the completed excel template,
then click the ②‘Import‘ button.

If after this your products are still not visible, refresh the page
For Windows「F5」
For Mac「Command」+「R」
If you have any questions, please contact us using the
Inquiry form
If you are in a hurry or need assistance by phone, please contact us at
050-1791-8946